Search This Blog

Pages

Showing posts with label Summer. Show all posts

June 11, 2011

New RARE IMAGE RUBBER STAMPS sheet out now with FREE SHIPPING!

 STAMPS:  girl - Rare Image Rubber Stamps, solid circle - Hero Arts, flower - Savvy, the rest - unknown
TECHNIQUES:  Technique Junkies Paper Piecing, Embellished Circles


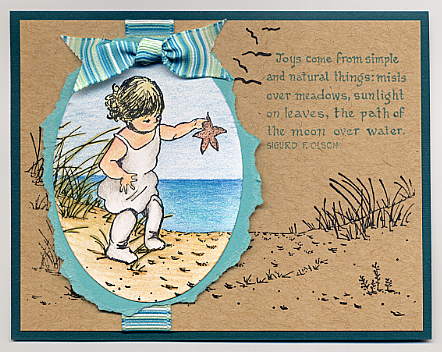
STAMPS:  child - Rare Image Rubber Stamps, scenery - Sarasota Stamps, words - (partial) Embossing Arts, seagulls - Just for Fun
TECHNIQUES:  Spotlight, colored pencils


These are just two of the little cuties featured on my newest 8 1/2" x 11" sheet of rubber called CHILDHOOD - featuring 16 adorable vintage child images in a pen-and-ink sketched style.  You can access the RARE IMAGE RUBBER STAMPS ordering and info page by clicking on the logo in the sidebar to the right.

Thanks for stopping by!

May 20, 2008

Finally, a post!! LOL

This card is especially for Laurie, who's been waiting so patiently LOL to see a fresh card post ;o)

I've only used one stamp here but isn't it a great one, especially for this time of year?! This chair in the sand image is by I Brake for Stamps and is on a half sheet of rubber, #IBFS-RB09.


Card measures 5 1/2" x 4 1/4"

The background is a Technique Junkies technique from the current newsletter called Mesh Direct. I used Stampin' Up!'s Buckaroo Blue and Marigold Morning inks for that, and the same for the scene, along with SU's Apricot Appeal and Palette's Burnt Umber. The grass was colored in using an Adirondack marker.

The scene done all in inks and sponges was inspired by the style on the blog Freedom in Creating Michelle is truly an artist and one of my favorite stampers for her unbelievable use of color and perspective! When you go to her page, click on the Tutorials link and prepare to sit for hours oogling and absorbing! The chair was stamped in the Burnt Umber, covered with a Versamark pen and then embossed in clear powder to allow me to color in the scene over it without ink soaking in to the main image. I pop-dotted the main panel so it would stand out more which only really shows irl.

To get the corners I just cut a square of brown cs, cut it on the diagonal and notched out the triangle as shown. I sponged the edges of these and the Stampin' Up! punched window strips with coordinating ink as listed above. The brads are pearlized light blue.

Thanks for stopping in, and don't miss my note on the top of the sidebar - thanks! :o)


January 23, 2008

Monday Lunchtime Sketch Challenge #1 Beach Chair

There's almost nothing I love in stamping as much as a sketch challenge, as I struggle most with layouts and sometimes I just like to have one handed to me! :o)

This is from a sketch challenge on Mary Jo's blog. There is a list of participating designers just under the sketch so you can go look at some blogs for inspiration before starting, if you want. I had to move my image panel to the other side to accomodate the direction the elements were facing, but otherwise stayed true to the original as best I could.

The one panel is a TechniqueJunkie technique from the current newsletter called Brayered Spots. This is the same technique I used on the time card (in pink) a few posts ago.


(click photo for detail)

Card measures 5 1/2" x 4 1/4"

After I had brayered the spots panel, I realized the three colors had mixed together and caused some pretty hard-to-match tones!! LOL This card is better seen in person as the scan had a hard time picking up some of the more subtle tones. The grass is actually green but it doesn't show here.

All stamps used on this, except the alphabet which is PSX, the Antique set, are Stampin' Up! from the Along the Shore set. Ink colors are Adirondack Mushroom, SU True Thyme (last year's In-Color), Distress Weathered Wood, and Sea Shells Sea Grass.

The upper left corner was stamped with the shells in Mushroom, the text in True Thyme, and then swiped with a white pigment pad and the Sea Grass, to tone it down and better match it to the brayered panel. All bkgd panels were edged from the inkpads.

The main panel was colored in with a blender pen, adding the horizon line by hand, and stippling Sea Grass around the edges to add some yellow tones. I wanted to collage it up a little so I stamped the phrase over it on one side, and added an antiqued rope-border disc with a stamped insert as shown. This main panel was backed with a piece of True Thyme cs, and then a hand-cut frame using some super wide woven ribbon I picked up at Joann's.

*tip*
If you have ribbon edges you worry about fraying, grab some Ranger's Matte Finish glue. It won't dry shiny :o) This tip was first brought to my attention by Debbie on her amazing blog, Thinking Inking.

Then I just pop-dotted the image panel and I was done.

Thanks for looking!