Search This Blog

Pages

Showing posts with label Beach. Show all posts

August 26, 2026

BEACH CHAIR


Hi friends!


Playing along with this THE PAPER PLAYERS challenge
(ends 8/28)


and this DRAGONFLY DREAMS Beach or Seaside challenge 
(ends 9/5)


Congratulations to The Paper Players team on so many years of consistent work to bring us a wonderfully interesting and beautiful challenge!!! You are much appreciated!
 

SOME DETAILS

Umbrella and chair were colored in with alcohol markers.

Ocean and sky were colored with various SU inks and blending brushes. My blending brush had a lot of dry finely caked on ink in it which lent itself well to providing a little visual texture to the ocean area. 

I added some reflective silvery white solid sequins to mimic seashells/sand dollars on the beach


SUPPLIES

 chair stamp and die - Paper Trey Ink Love Notes set
umbrella stamp and die - Gemini Road Trip set
sentiment stamp - Paper Trey Ink Button Bits set 
alcohol markers
Gina K Designs sequins
Stampin’ Up! inks


Thanks for stopping in today!


July 19, 2026

HAPPY DANCE


Hi friends!


Playing along with this AAA CARDS challenge


 Well.  This one was supposed to be a sophisticated, classy sort of card, but as you can see - things veered off-track. I think it may have been the bright colors, which led to the googly eyes, which required a nose…


THE PROCESS

To start: I swiped a bright white card with three colors of acrylic paints, using a common rounded flat paintbrush. 

After the paint was dry, I heat embossed a starfish using gold powder. 

To finish: A couple googly eyes were glued down, and an enamel nose was applied.

I added a strip of sturdy card stock to the back of the pre-printed strip and glued the sentiment to the card front as shown. 


SUPPLIES

starfish stamp - Rubbernecker
acrylic paints
gold embossing powder
pre-printed sentiment strip
googly eyes
enamel dot


Thanks for stopping in today!

July 18, 2026

SEASHELL AT THE SEASHORE

 Hi friends!


Playing along with this JUST US GIRLS challenge 
(ends 7/22)


and this ALLSORTS “At the Seaside” or Anything Goes challenge
(ends 7/30)

Well I just fell in love with the camera angel of that solitary shell in the lower righthand corner of the board!  There could be beach blankets all around it, and dogs barking, and kids laughing and running. Or it could be the only thing in a huge stretch of off-season sand. I hope my card has that same feel about it. 


THE PROCESS

First steps: I started by stamping the shell in gold holographic embossing powder on bright white card stock. The sparkles are subtle and tiny in person, and so they barely show here.  I fussy cut the shell out, and then used Antique Linen and Pumice Stone inks with a mini blending brush to shade it. 

The background was made simply, by tearing strips of blue scrap card stock and gluing them down with the ragged edges showing. One of the lighter colors had a white core which really added to the waves effect. I used a bit of vellum at the shoreline as well. 

*TIP of the Day*
If you start the layering effect with a sheet of copy paper the size you want to end up with, you don’t need to worry about matching up the length at the ends. Just focus on getting the torn edges lined up horizontally as desired, then flip your panel over and trim right along the copy paper sides for a nice clean finish :o)

To finish: I used some of the Pumice Stone ink to blend a shadow into the sand where the shell would rest. The shell was glued flat, and the sentiment was stamped in Pumice Stone and then fussy cut and foam mounted. Three holeless satiny gold sequins applied as shown. 


SUPPLIES

shell stamp - Rubbernecker
sentiment stamp - Stampa Rosa Inc./ Tin Can Mail #C 59-527
gold holeless sequins - Spellbinders Satin Gold
embossing powder - Creations Unlimited Golden Ivory
Distress ink pads


Thanks for stopping in today!


May 14, 2026

BEACHCOMBER HELLO.

 Hi friends!


Playing along with this FRESHLY MADE SKETCHES Challenge
(ends 5/18)
Update: 
My card got a shout-out this week from Cecile!


(ends 5/20)

UPDATE!


I’ve been waiting all Winter and Spring to dig out some seashell images - nothing says Summer to me like all things beach!! 

As soon as the newest FMS challenge sketch posted I knew I wanted shells, but didn’t decide on blues/greens til I went pawing through my handmade card stock scrap folder and saw this piece. I’ve hoarded it because it just screamed to me that it had to be beach-related. 

*TIP* When I get a sluggish day in the craft room, I dig out some favorite Distress ink pads, smoosh them on to a slick surface, spritz with water and press white card stock into the mess. If you dry between colors you’ll get brighter more distinct patterning. 

I embossed a 3D folder lightly to get a wavy sand feel on the kraft card stock. The shells were stamped in Versamark onto colored card stock, heat embossed with detail white powder and fussy cut.

*TIP* In this instance I didn’t want any adhesive interfering with the vellum effect so I folded each end over the patterned card stock, then trimmed off at the seam line any vellum that would be doubled over the kraft area. This still left a good size tab to fold over and glue onto the back of the patterned paper. 

Starfish points and sentiment were foam mounted. 


SUPPLIES

sand dollar stamp - PSX #C-194 (1983!!)
starfish stamp - Fred B. Mullett #201
nautilus Shell stamp - JRL Design
word dies - Spellbinders Hello Smile die set S1-154
embossing folder - Altenew Ribbon Waves
flat back dots - Pink & Main Marshmellow
white detail embossing powder
vellum


Thanks for stopping in today!


August 13, 2022

BEAUTIFUL DAY

Hello!

I found the coolest Challenge Blog today!  The Dream Factory puts up movie posters as prompts.The theme currently is the movie Old (see graphic below). 


TECHNIQUES

basic stamping  (woman image, ocean) 
alcohol markers  (woman on blanket)
white gel pen  (water, blanket stripes)
white pigment ink  (large section of waves)
preprinted  (white sentiment strip)
low profile foam mounting  (image panel, words)
light kraft card stock  (main panel)
stenciling  (sun) * I punched a circle from scrap card stock and used the negative space to ink a sun, first with bright yellow, and then edged with a darker shade.  I brushed some of the yellow around the sun for a brighter sky effect.


SUPPLIES

woman stamp  -  Viva Las Vegastamps!
ocean stamp  -  Cherry Pie Art Stamps unmounted red rubber set
inks  -  Distress Oxides Salty Ocean, Peacock Feathers, Squeezed Lemonade, Scattered Straw and Frayed Burlap
preprinted sentiment  -  Tim Holtz idea-ology Small Talk #TH93704
light kraft card stock  -  random stash


Sharing this card with the following Challenges:

#106  Old


#688/9  Anything Goes w/Option of 
Make Your Own Background  (ends 8/19)

Keep Your Cool  (ends 8/19)

#296 Summer and a Sentiment  (ends 8/31)

#220  Make Your Own Background  (ends 8/24)


Thanks so much for stopping by today!!


July 29, 2021

VACATION SHELL

Hello there!


TECHNIQUES

ink blending

to add interest to the distress oxide ink blend, I flicked the panel with water, and when it was dry I added white Nuovo drops


STAMPS

word panel 'vacation' - O'scrap! 2004 2-sided stamp
shell collage - Stampington & Company 'Parisian Shell' #C8446


Playing along with the following Challenges:


The card below was created using the same ink blending colors.  Please see adjacent post for more details:


Thanks for stopping by!


February 16, 2020

Seashore

Hope you're having a great day!


SUPPLIES:

Stamps - Stampin' Up! SEASIDE shells, O'scrap! words
Stencil - Altenew FLOWING DROPS
Ink - Memento Tuxedo Black
Watercolors - Grumbacher Transparent
Other - flower petal rounding tool, paintbrushes, scrap netting fabric, foam mounting tape
Cardstock - Neenah Classic Crest Solar White 110 lb


TECHNIQUE:  

1.  Temporarily adhere stencil to white cardstock
2.  Use wet paintbrush to apply blue and tan watercolors on top of stencil. 
(TIP * Paint partial areas, letting paint settle in before coming back with another color)
3.  Remove stencil and allow panel to dry completely.
4.  Lay stencil back in place and use a fine point black marker to trace around all stencil edges.
5.  Stamp shell images on white cs using black ink.  
6.  Use a damp brush to add coloring to shells.  Allow to dry.
7.  Fussy cut shells, and lay them facedown on foam mat.  Use a petal rounder to round shells 
(TIP * Start at the center with small circles and widen circles as you work your way out to edges, using even pressure.  I find heavy cardstock is best.)
8.  On white cs stamp words in black ink.
9.  Adhere netting scrap to panel (TIP * I find Gina K. Connect glue to give me the best results I've had yet gluing something awkward like this).
10.  Adhere word panel over netting, and attach shells using foam mounting tape.


Thanks for stopping by!
May you be blessed today, and may you be a blessing...

Nancy

November 07, 2019

Beach Joy


Entering this card into the following CHALLENGES:


STAMPS: children - unmarked, joy - A Muse "Joy hand" (#6-8167B), poem - Inky Antics (M1-1809-2K)

INKS: Distress Scattered Straw and Weathered Wood, Stampin' Up! Bordering Blue, VersaMark, Memento Tuxedo Black

OTHER: Recollections Snow detail embossing powder, Recollections bling stickers, Martha Stewart "Mermaid" stencil 


1. Smoosh Distress inks onto craft mat and spritz with water. Lay white cardstock face down and press to absorb inks.  Let dry.
2. Stamp poem on white cardstock repeatedly in Bordering Blue ink. Trim to fit black card and affix.
3. Use stencil to apply Scattered Straw ink to poem area. 
4. Stamp poem on black cardstock using Versamark and white embossing powder. Trim out desired words into rectangles.
5. Stamp children on multicolor panel, and tear along bottom edge. Affix to cardfront.
6. Punch a circle from scrap yellow distressed panel and sponge around edge with yellow ink.
7. Stamp Joy on circle with black ink and pop-dot to panel. 
8. Affix gems to cardfront as desired.


Thanks for stopping by!
May you be blessed, and may you be a blessing... :o)

Tropical Retirement

This isn't me but I wouldn't mind if it was ;o) 
Also, I could do paper-piecing all day long!

Inspired by, and entering, the following CHALLENGES:


Stamps: Art Impressions penguins (#P-3158), River City Rubber Works "Retirement Means" (#3024-G)

Ink: Memento Tuxedo Black, Stampin' Up! Daffodil Delight

Markers: Copic as shown

Other: JudiKins brush dauber, patterned paper (maker unknown)


1. Stamp image on patterned paper. Trim and apply to stamped image on white card. (I like to run a black marker around all trimmed edges to avoid a halo effect.)
2. Use markers to color image.
3. Punch a circle from scrap cardstock and sponge yellow ink on outside top and sides. (I did do a partial mask on the male penguin so I didn't get any sun on him LOL)
4. Trim around image into modified rectangle, leaving sun intact.
5. Layer onto card with patterned paper strips and turquoise panel.
6. Use black ink to stamp phrase.


Thanks for stopping in! 
May you be blessed and may you be a blessing.... :o)


October 28, 2019

Love a Good Challenge Sketch!


Coloring is all pencils.  Brown cardstock layer has metallic flecks throughout.


Stamps:  Impression Obsession "Nautilus" F4345, Ann-ticipations phrase #12081 (2002)

Inks: Memento Tuxedo Black, Stampin' Up! Early Expresso

Other: colored pencils - Prismacolor Beige, Sienna Brown & Slate Grey, Crayola Tan,  Memory Pencils EK Teal


Update: So pleased to have been a RRCB top pick with this card!


Thanks for stopping by! 
May you be blessed and may you be a blessing...  :o)


June 11, 2011

New RARE IMAGE RUBBER STAMPS sheet out now with FREE SHIPPING!

 STAMPS:  girl - Rare Image Rubber Stamps, solid circle - Hero Arts, flower - Savvy, the rest - unknown
TECHNIQUES:  Technique Junkies Paper Piecing, Embellished Circles


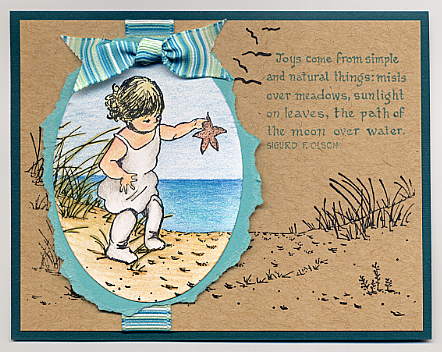
STAMPS:  child - Rare Image Rubber Stamps, scenery - Sarasota Stamps, words - (partial) Embossing Arts, seagulls - Just for Fun
TECHNIQUES:  Spotlight, colored pencils


These are just two of the little cuties featured on my newest 8 1/2" x 11" sheet of rubber called CHILDHOOD - featuring 16 adorable vintage child images in a pen-and-ink sketched style.  You can access the RARE IMAGE RUBBER STAMPS ordering and info page by clicking on the logo in the sidebar to the right.

Thanks for stopping by!