Welcome to my new series One Item, Multiple Looks!
I'm really excited to inspire myself and others to
* explore and stretch the supplies we own
* let go of anything we don't love
* choose wisely when repurchasing
* explore the endless techniques and styles available to us
I will be posting one new grouping featuring a different specific crafty item each week for at least the next month or so. To access all posts in this series just click on the topic One Item Multiple Looks! in the sidebar Index of Posts... Hope you enjoy!
So much fun to work on these unicorn cards! I really felt it helped in the creative process to leave ALL the things out on my desk as I went. I'll describe the SUPPLIES and STEPS separately as each was a different process...BUT!!!...
...save ALL your pieces when die cutting. It might be hard to see at first in photos, but I used the silver pieces left over from the red card to add to the unicorn on the rainbow flourishes. I used the rainbow mane from the full bodied rainbow unicorn on the white horse. I used the negative space from the white unicorn as the inlay background for the yellow stenciled piece. I used the leftover horn pieces to color and add to the unicorn on the red card.
Whew! Easier done than said, I promise! LOL Read on for all the details, and have so much fun playing with whatever die cuts you have in your space.

Here we go!

SUPPLIES
STAMPS circular words - Autumn Leaves Sentiments Circles #AL2618, phrase - Stampin' Up! A Happy Thing set
INKS Versamark
DIECUT unicorn (I trimmed off the horn) - Jane Davenport Happy Little Unicorn #JDD-006
EMBOSSING FOLDER circles - Stampin' Up!
EMBELLISHMENTS flowers - Duncan Enterprises for PSX rock, paper, scissors line
OTHER Stampin' Up! White Detail Embossing Powder
PAPERS cardstock in assorted colors, Neenah Classic Crest Solar White 110 lb, vellum

STEPS
1. Cut black and yellow cardstock to fit a standard white card in layers as shown. Set aside.
2. Run vellum panel through machine with dots embossing folder. Set aside.
3. To make the rainbow paper: trim card-size colored cardstock to varying width strips. Apply glue or double-sided adhesive to back of strips and line them up on a sheet of copy paper or thin piece of cardstock. When you have a piece that is about 4 1/4" x 5", trim a strip off short end as shown for decorative strip on card. Set aside. (Jennifer McGuire has tons more advice on the best ways to do this technique. My blue cardstock was thicker than the rest so I got a very organic textured look LOL)
4. Using the larger rainbow panel, die cut unicorn to get the mane, and set the rest aside.
5. Die cut another unicorn from white cardstock.
6. Use Versamark ink to stamp circle badge on black cardstock and heat emboss with white powder. Set aside.
7. On black scrap cardstock, stamp phrase in Versamark ink and heat emboss with white powder. Set aside.
8. Time to assemble! Adhere yellow cardstock to card front. Wrap vellum around black panel and adhere to reverse. Glue horse to panel and insert rainbow mane (I found it necessary to trim the hooves for better placement on the card). Adhere rainbow strip and phrase strip. Adhere flowers with sticky foam attached.

Playing along with the following Challenges:


SUPPLIES
STAMPS words - DeNami Design
INKS Versamark
DIECUT unicorn - Jane Davenport Happy Little Unicorn #JDD-006, small banner (I cut it in half to lengthen the look) - Stampin' Up! Itty Bitty Banners, scallops - Stampin' Up! Edgelits - Large Scallop #127019
EMBOSSING FOLDER snowflakes frame - Darice
EMBELLISHMENTS square flat back mirrored gems - Duncan Enterprises for PSX rock, paper, scissors line, black faceted flat back gem - Jolee's Boutique
OTHER Stampin' Up! White Detail Embossing Powder, Sakura white gel pen, Copic red marker
PAPERS random red and black cardstock, Neenah Classic Crest Solar White 110 lb, vellum, matte silver cardstock

STEPS
1. Cut red cardstock to fit a standard white card. Set aside.
2. Run white cardstock panel through machine with snowflake embossing folder. Set aside.
3. To make the vellum borders: run two 2" strips of vellum through die cutting machine using scalloped border die cut. Highlight with white gel pen dots. Set aside.
4. Die cut unicorn from matte silver cardstock, and set the rest aside for another card.
5. Die cut another unicorn from white cardstock, or use scraps from card above, and color red stripes onto horn insert pieces. Set aside.
6. Use Versamark ink to stamp phrase on black cardstock and heat emboss with white powder. Trim ends into banner shape. Set aside.
7. Die cut small banner from white cardstock. Trim in half and set aside.
8. Time to assemble! Wrap vellum around red panel at top and bottom and adhere to reverse. Adhere red cardstock to cardfront. Adhere snowflake panel to red panel. Glue horse to snowflake panel and insert peppermint striped horn pieces. Adhere white banner behind black banner as shown and adhere to card. Accent card with gems.

Hard to capture the silvery glow of the matte silver cardstock!
Playing along with the following Challenges:


SUPPLIES
INKS Distress Oxide Honey
DIECUT unicorn - Jane Davenport Happy Little Unicorn #JDD-006
EMBELLISHMENTS flat back reflective flowers - unknown
OTHER old partial piece of decorative metal screen for embossing background, glitter glue - Stickles Frosted Lace, fine point black marker
PAPERS cardstock in assorted colors, Neenah Classic Crest Solar White 110 lb

STEPS
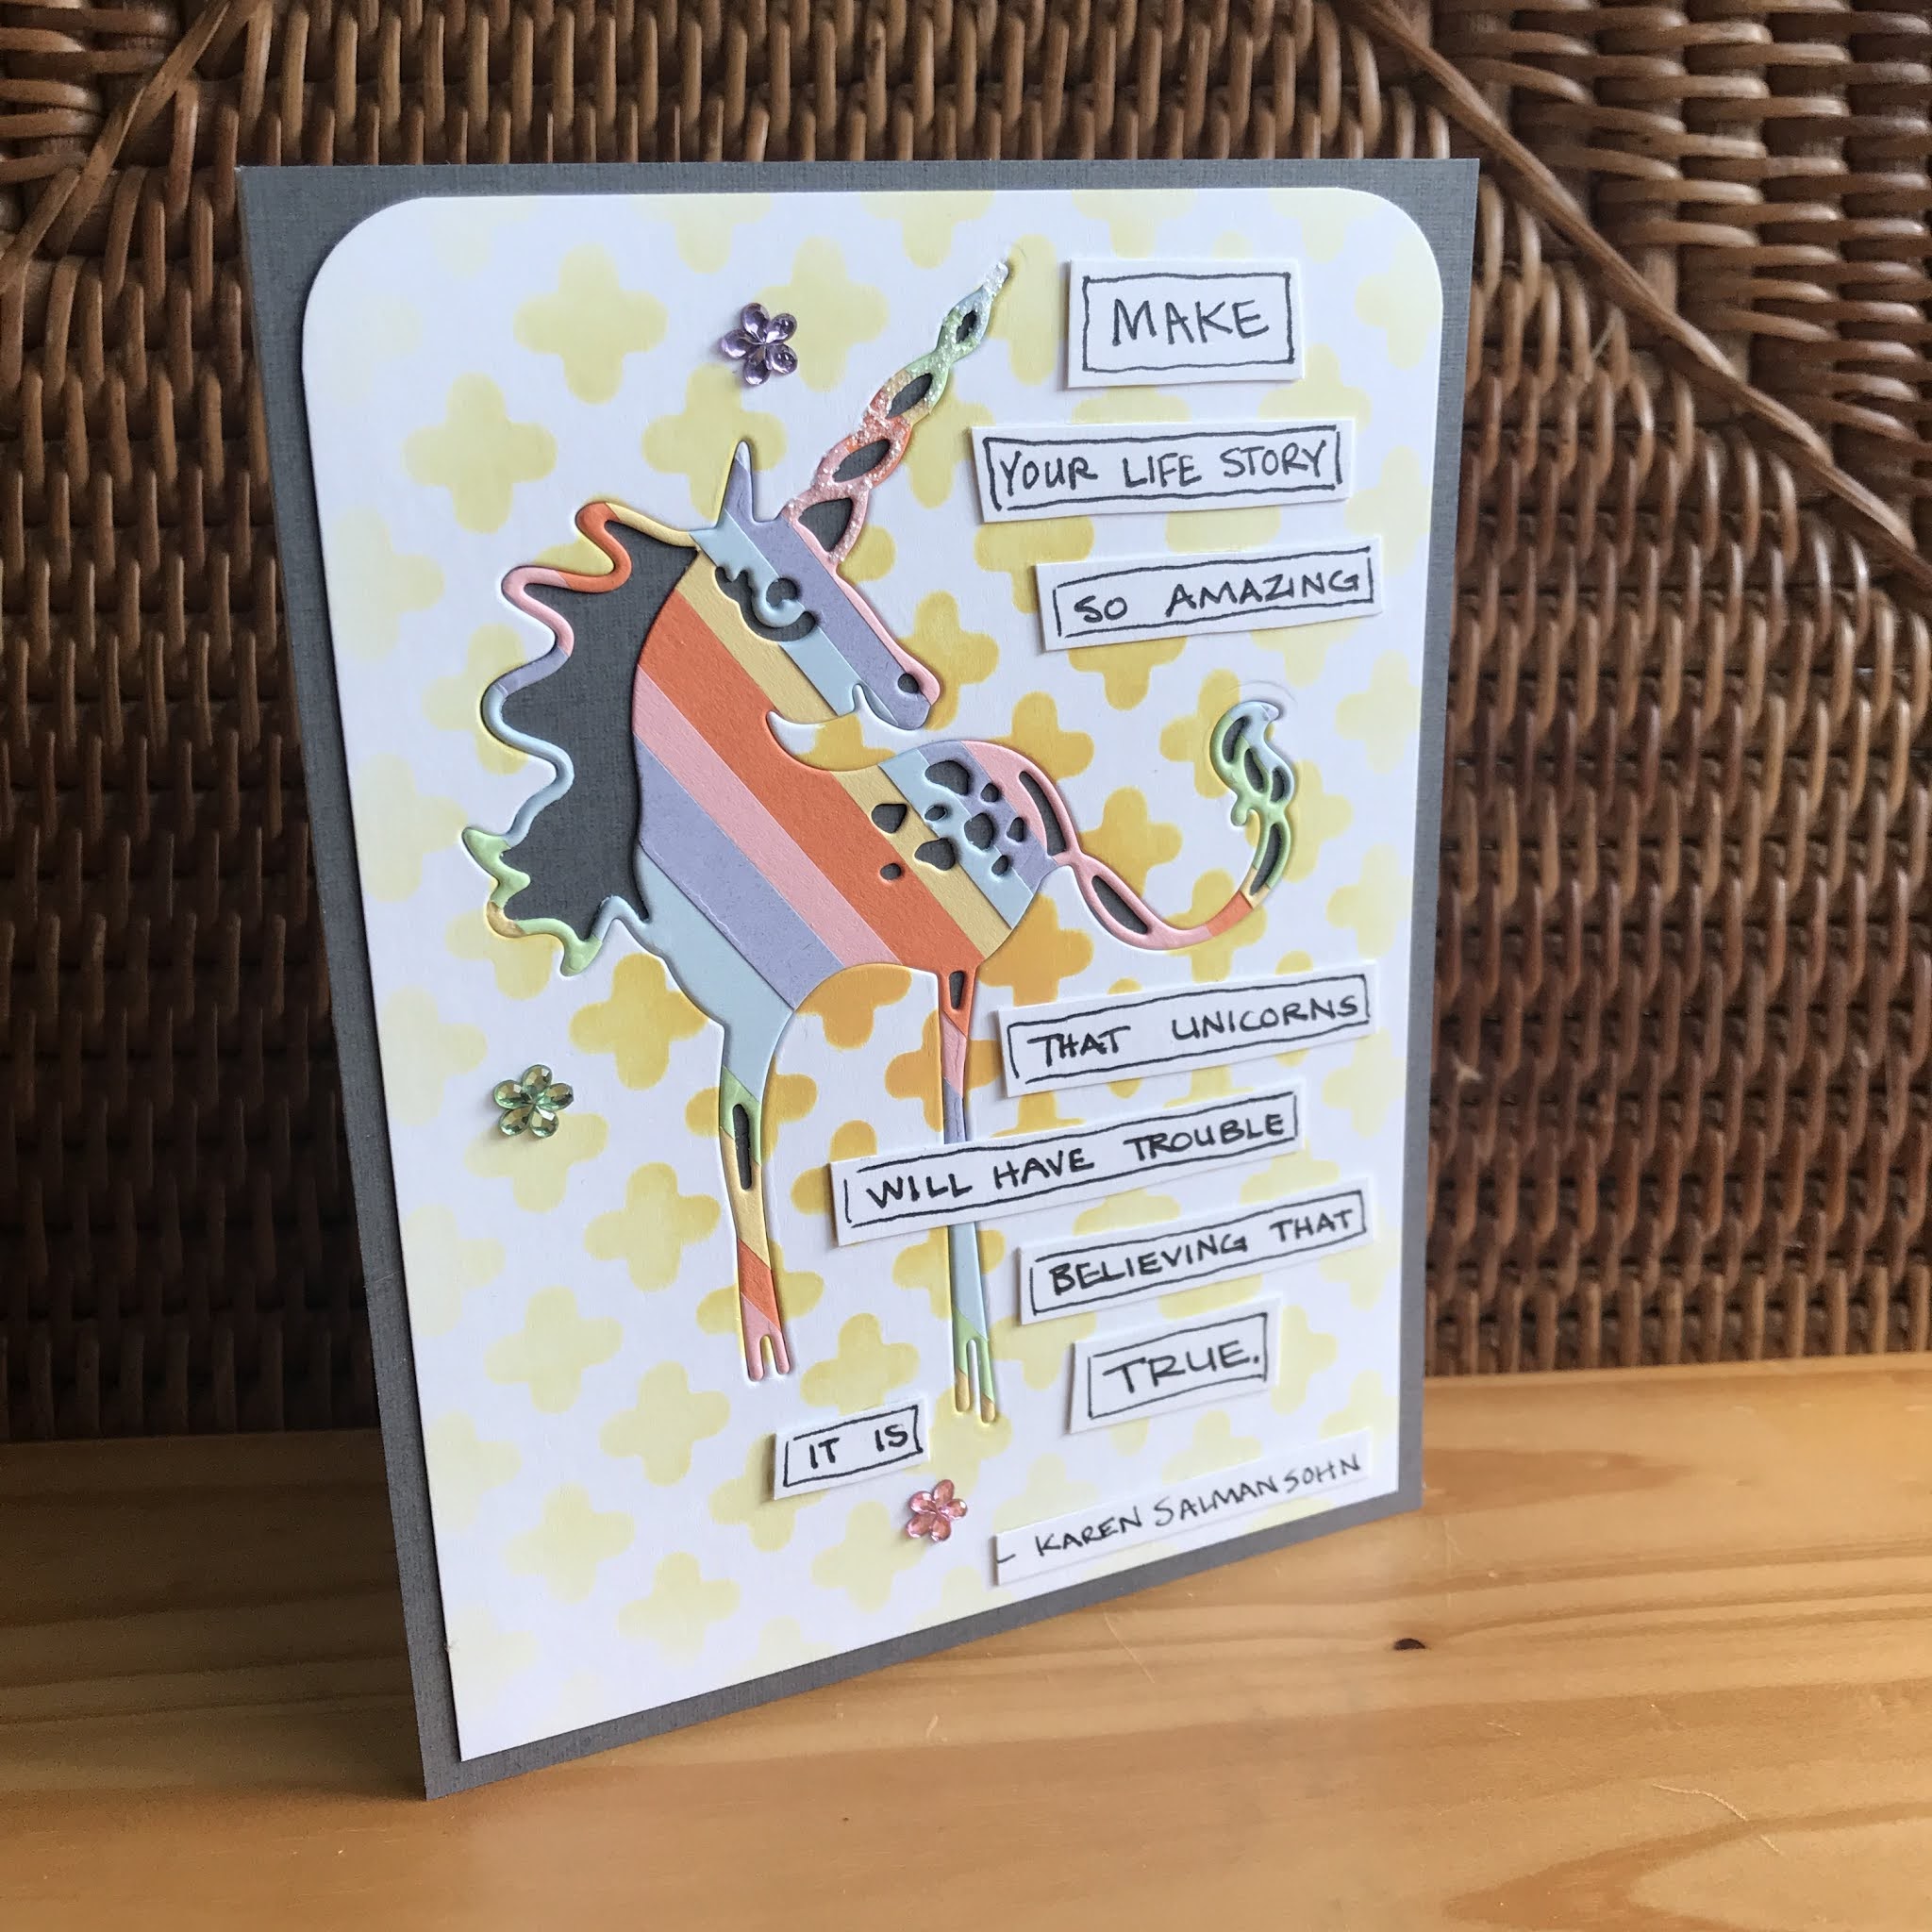
1. Cut grey cardstock to fit a standard white card. Set aside.
2. To make the rainbow paper: trim card-size colored cardstock to varying width strips. Apply glue or double-sided adhesive to back of strips and line them up on a sheet of copy paper or thin piece of cardstock. When you have a piece that is about 4 1/4" x 5".
3. Die cut unicorn from rainbow panel. (Set the rest aside for other cards.) Set aside.
4. Die cut another unicorn from white cardstock so you can use the piece that looks like an outline. (If you've made the other cards you will have the negative space piece already).
5. Stencil this negative space white cardstock panel by sponging or blending ink through the mesh panel, keeping ink darker towards the center area. Set aside.
6. Go online and pick a phrase you like pertaining to your main image. Write it out on white cardstock, leaving lots of space top and bottom of each word or part of phrase. Enclose words or phrases, with hand drawn black pen borders. Trim the sections with scissors. Not to worry if you don't like your writing - a non-precise look is what you're aiming for.
7. Time to assemble! Adhere grey cardstock to cardfront. Adhere white cardstock panel to grey panel. Glue reverse of rainbow unicorn and insert into white panel. Adhere words as shown. Add glitter glue to horn. Adhere flat back gems as desired.
Playing along with the following Challenges:

SUPPLIES
STAMPS words - Penny Black Joyous Season #3234F
INKS assorted Distress Oxide
DIECUT unicorn - Jane Davenport Happy Little Unicorn #JDD-006
STENCIL flourishes - Altenew Flowing Drops #ALT2389
EMBELLISHMENTS googly eye
OTHER silver detail embossing powder, Sakura white gel pen, blending brushes
PAPERS Neenah Classic Crest Solar White 110 lb, vellum, matte silver cardstock

STEPS
1. Cut white cardstock to fit a standard white card with room for a border. Set aside.
2. Cut vellum panel on a slope as shown with room to wrap around sides and sit flush with the bottom edge. Set aside.
3. To make the background, tape the stencil over the white panel. Starting at the top, and going in ROY-G-BIV order (red, orange, yellow, green, blue, indigo, violet - thanks Kathy Zielske for all your wonderful YouTube videos!), start blending inks from the upper corner, down at a diagonal. Remove the stencil and lightly blend the same ink colors over the stenciled flourishes (thanks for this reminder of an awesome technique to Crafty Little Pill, also with YouTube videos you will love!) Set aside to dry thoroughly .
4. Die cut unicorn from matte silver cardstock (or use pieces from red card avove).
5. Die cut another unicorn from white cardstock (or use scraps from card above). Set aside.
6. Use Versamark ink to stamp phrase on stenciled panel (if it has dried completely) and heat emboss with silver powder.
8. Time to assemble! Wrap vellum around bottom of stenciled panel at sides and adhere to reverse. Glue unicorn to stenciled panel as shown. Insert matte silver inserts to unicorn image. Adhere googly eye. Adhere panel to cardfront. Accent card with faux stitching along edges using white gel pen.

Really shimmers nicely in the sunlight!

Playing along with the following Challenges:

If you read to the bottom, you are a rockstar!
If you just came for the pictures you are a rockstar!
If you just got here by accident I'm not mad about it :o)
Have a wonderful day, full of blessings, and gratitude, and maybe even miracles!!!


