Search This Blog

Pages

Showing posts with label Autumn. Show all posts

August 28, 2026

GOLDEN LEAVES


Hi friends!


Playing along with this FRESHLY MADE SKETCHES challenge by Michele (ends 8/31)

 
SOME DETAILS

This leaf die set includes a base and an openwork die in each size. So I cut both bases from a speckled mustardy yellow, and also the openwork dies from white and gold cardstock. Then it was just a matter of gluing in some inside pieces as shown - the gold pieces into the white frame, and the white pieces into the gold frame. 

The dark brown square was embossed with a SU Subtle folder. 


SUPPLIES

sentiment stamp - SavvyStamps Happy Fall Sans Script #697B
leaf dies - Paper Trey Ink Leaf Silhouettes set
dies - Spellbinders Push Pin Notes #S3-550
brown square embossing folder - Stampin’ Up! subtle
tree trunk embossing folder -  Sizzix Tim Holtz Alterations 
flat back pearls and gold balls


Thanks for stopping in today!


September 06, 2022

CAS AUTUMN x2

Hello!


Sharing these cards with the following Challenges:

(ends 9/9)

(ends 9/16)


TECHNIQUES

direct stamping  (tree, spots, sentiments)
flat back gems  (rhinestone dots in trees)

* to get colors evenly spaced in the foliage area it helps to start with the darkest color and space three out, then stamp out the next darkest color, and so on as the lighter colors are less visually impactful and if you get too many in one place it won't be as noticeable  :o)


SUPPLIES 

tree stamp  -  Penny Black Fantasy #3880K
dots stamp -  Hero Arts Box of Dots #LL890
Blessings... words stamp  -  Hero Arts Count Your Blessings #C3814
Bible verse stamp  -  Biblical Impressions unmounted red rubber
inks  -  Memento black, Stampin' Up! colors
patterned paper  -  leftover stash (Stampin' Up!, I think)
flat back gems  -  Park Lane


Thanks for stopping by today!!


October 25, 2021

AUTUMN LEAVES

Hello!


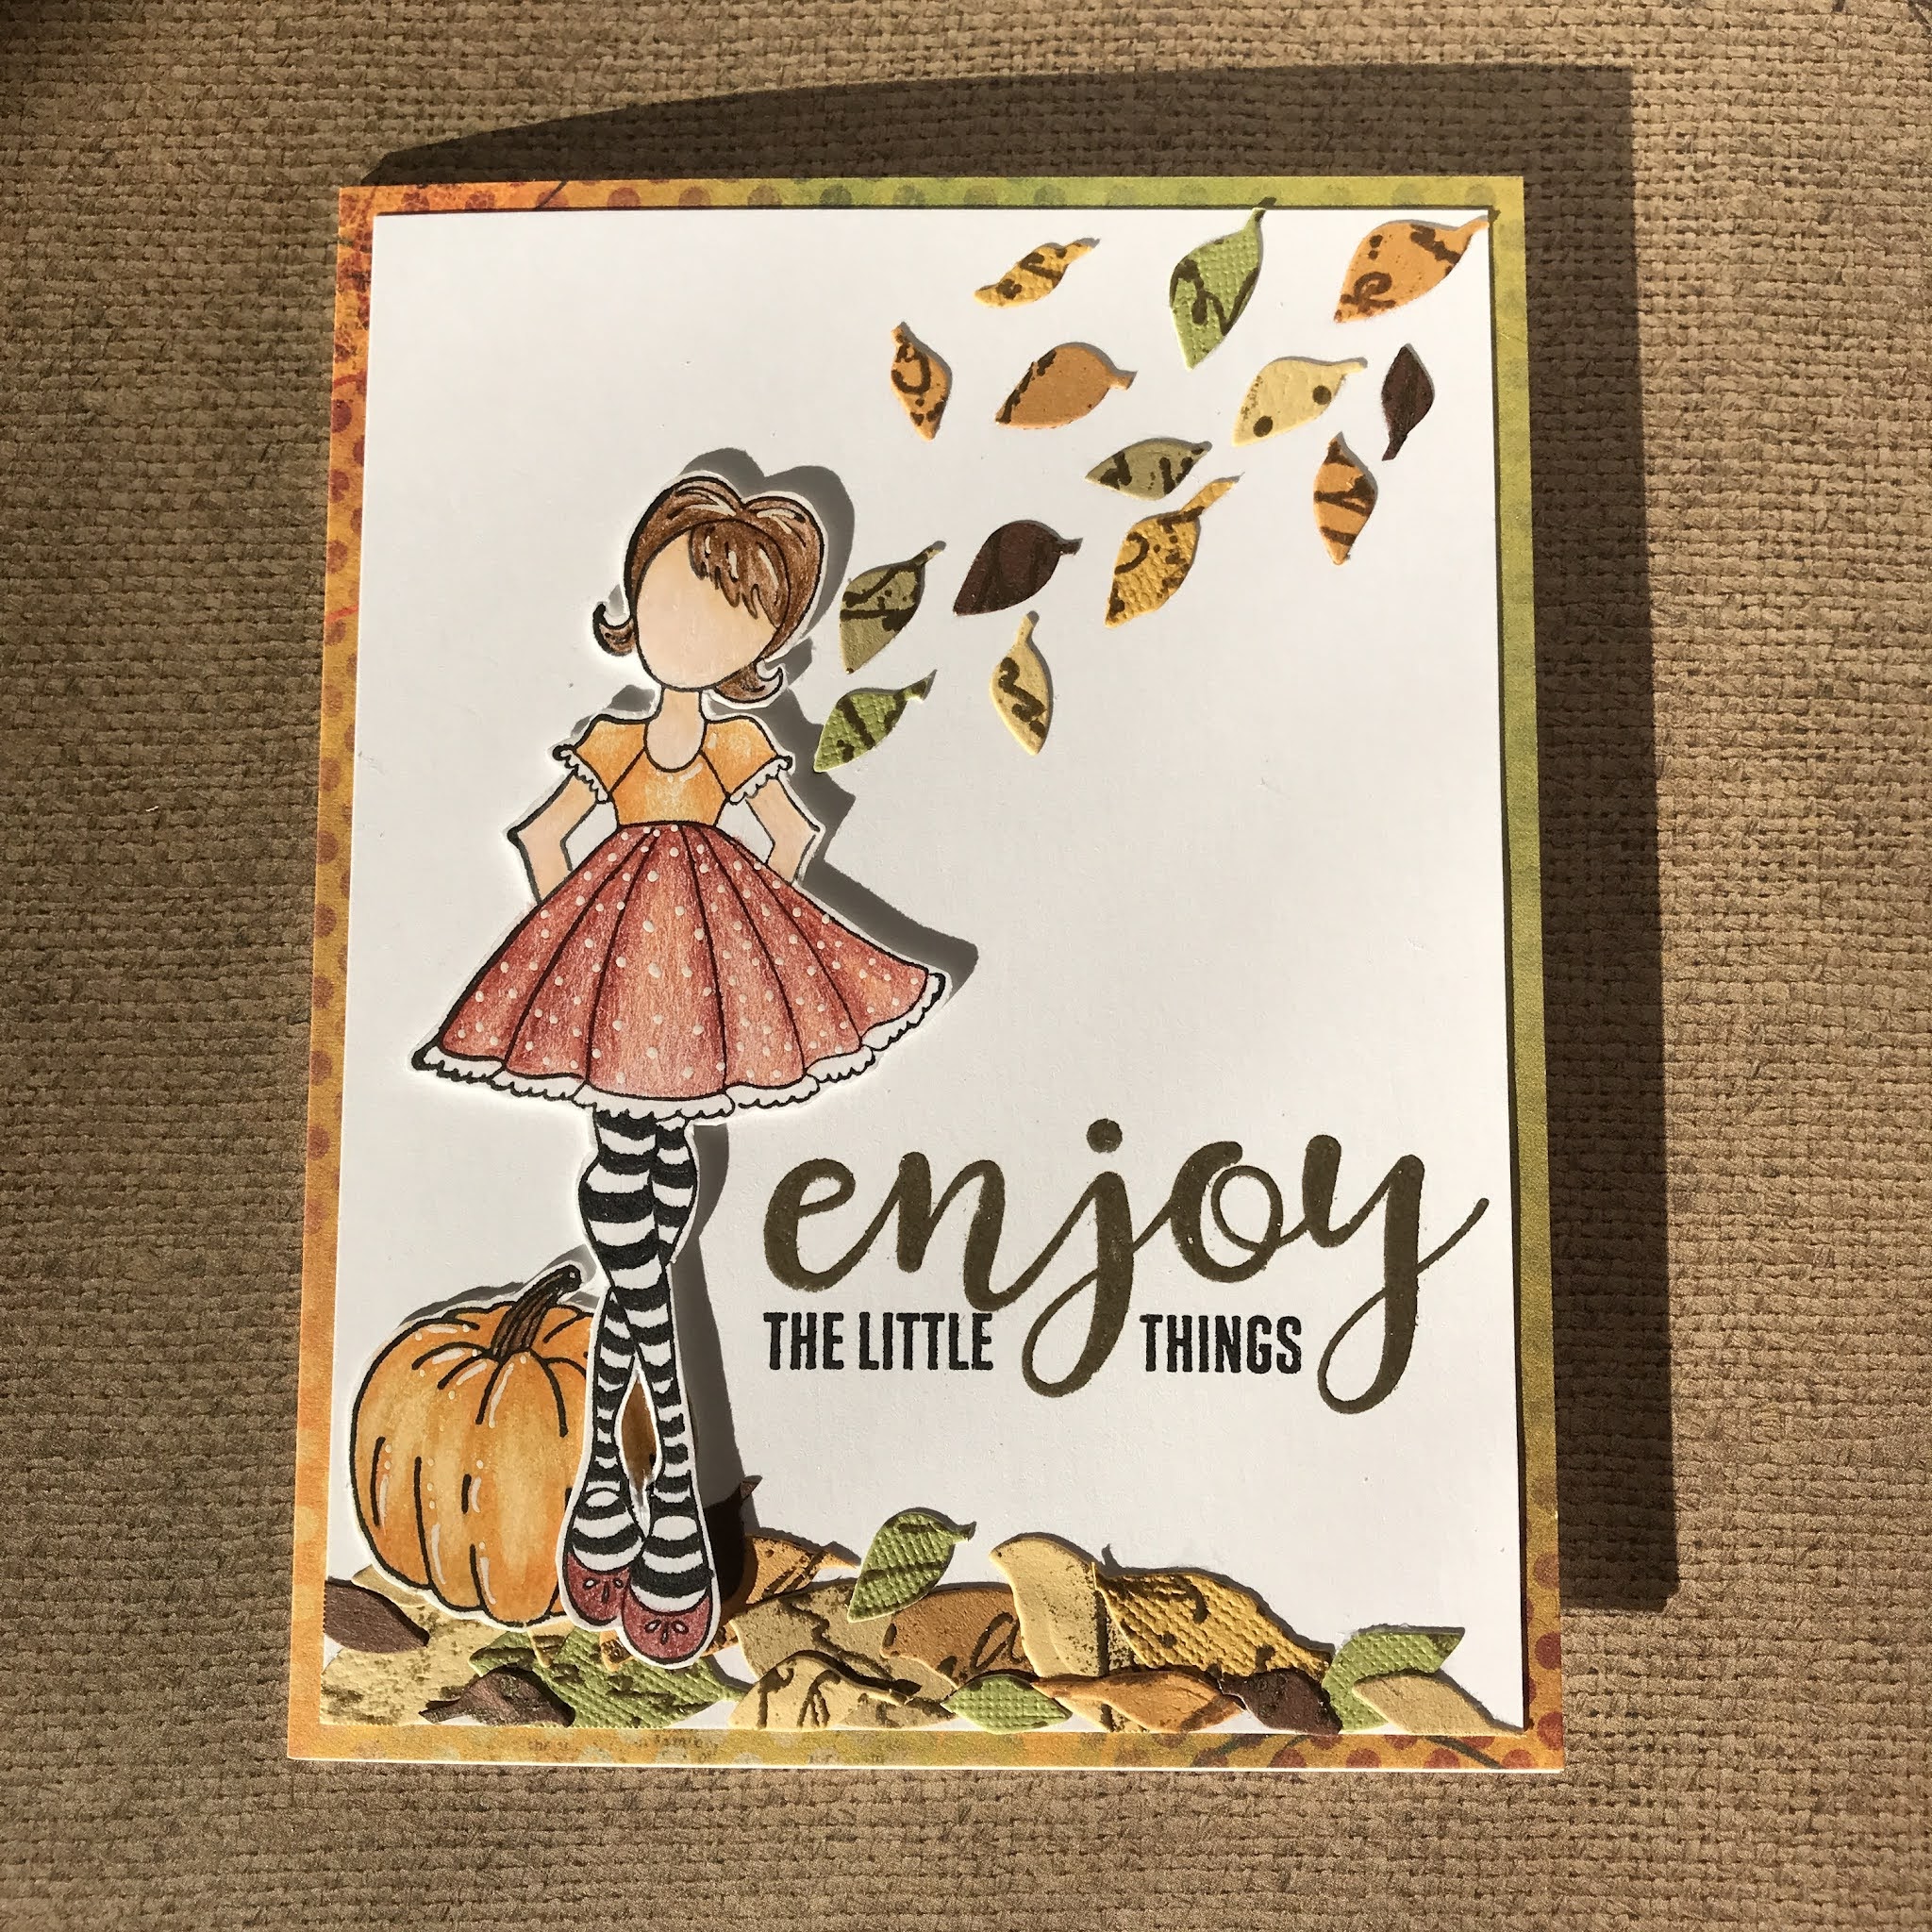
 CARD #1


TECHNIQUES

colored pencils (figure, pumpkin)
die cutting (leaves) 
fussy cutting (girl, pumpkin) 
heat embossing (leaves, large sentiment word) 
white gel pen (polka dots and hair highlights, pumpkin highlights) 
black fine point pen additions (tights) 
patterned paper (card front)


SUPPLIES

figure stamp - Prima Juli Nutting "Holiday Bliss" set #911713
pumpkin stamp - 1993! company unknown
text stamp (on leaves) - Just for Fun
sentiment stamp - American Crafts Jen Hadfield set #372084
leaf dies - Ellison Thinlits set #661206
patterned paper - BoBunny "Autumn Song" #14717888


Playing along with the following Challenges:


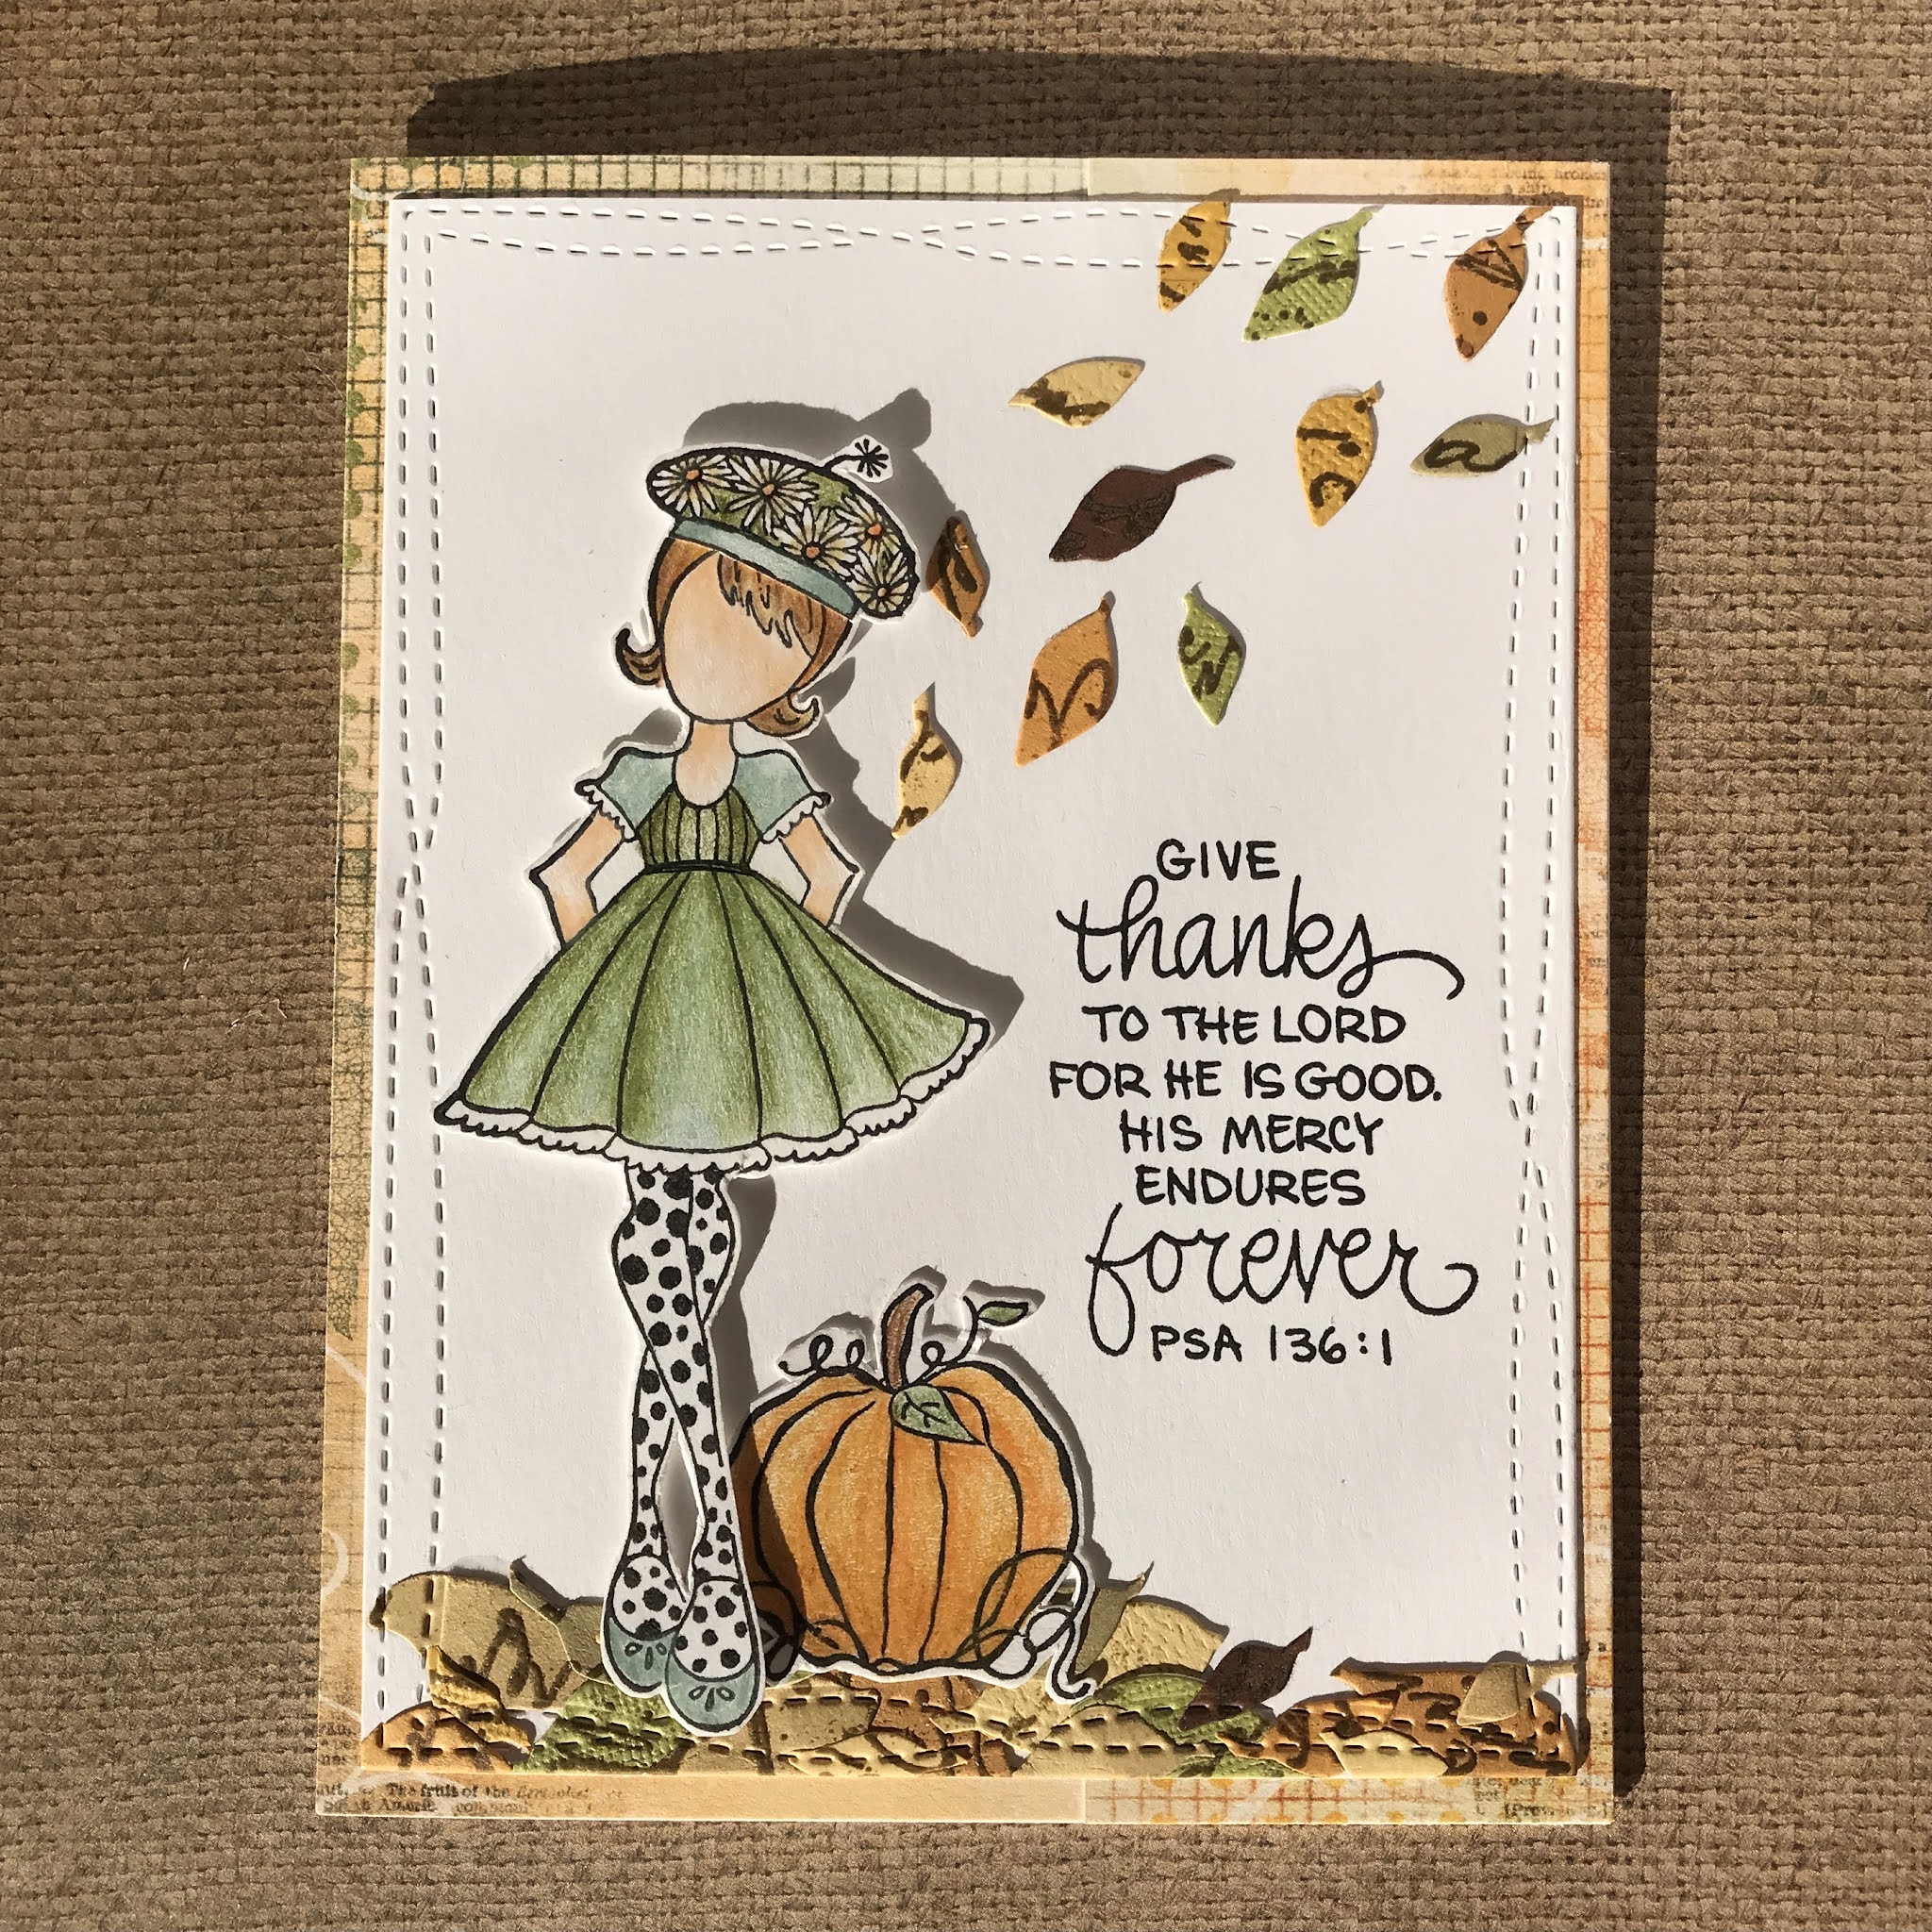
CARD #2


TECHNIQUES

colored pencils (figure, pumpkin)
die cutting (stitched frame, leaves) 
fussy cutting (girl, pumpkin) 
heat embossing (leaves) 
black fine point pen additions (tights) 
patterned paper (card front)


SUPPLIES

figure stamp - Prima Juli Nutting "Holiday Bliss" set #911713
hat stamp - TAC The Angel Company "Hat Border" #2182
pumpkin stamp - Paper Inspirations "Petite Pumpkin" #E9844
text stamp (on leaves) - Just for Fun
sentiment stamp - Stampendous Bible Verses set #SSC339
stitched frame die - My Favorite Things
leaf dies - Ellison Thinlits set #661206
patterned paper - BoBunny "Autumn Song" #14717888


Playing along with the following Challenges:


Update:


Update: 
Loving playing with this stamp, and I was determined to use up all the little leaf dies I had cut for THIS CARD.


Thanks for stopping by today!

November 19, 2020

AUTUMN CELEBRATION

Hello!


SUPPLIES

STAMPS:  child scene - Rare Image Rubber Stamps -Vintage Children sheet *Note* if you are looking for this to purchase it is from my own sheets of rubber, which are available if you send a note to me nancyj208@gmail.com (see sidebar for more sample cards, etc  :o) sentiments - Stampin' Up! assorted
INKS:  Distress Stormy Sky & Vintage Photo, Memento Tuxedo Black
MARKERS:   Copic
STENCIL:  clouds - Chalk Talk
DIE:  banner - Stampin' Up! Framelits Bitty Banners (please note that it is shorter and I extended it when running it through the Big Shot partially from both ends)
CARDSTOCK:  Neenah White Classic Solar White 110 lb


STEPS

1.  Cut white cardstock to desired size to allow for border
2.  Lay cloud stencil on card and repeatedly add ink using blending brushes and dye ink
3.  Stamp main image near base as shown in black ink.  
4.  Stamp same image on scrap cardstock, color with markers, and fussy cut
5.  Color in grasses and leaves with markers
6.  Blend brown ink up from bottom of panel as shown
7.  Die cut banner and score two lines for folding under as shown
8.  Stamp sentiment on banner, and another on main panel
9.  Affix banner to panel with foam tape in the center and double sided tape at ends
10.  Use foam tape to adhere child figure cut out over original image
11.  Adhere image panel onto top folded white card front


Playing along with the following Challenges:

This image is from a stamp sheet copyright 2011 and I have been using it that long, but is still available so not sure if that counts per Challenge rules?!


 Thanks for visiting!!!

October 28, 2020

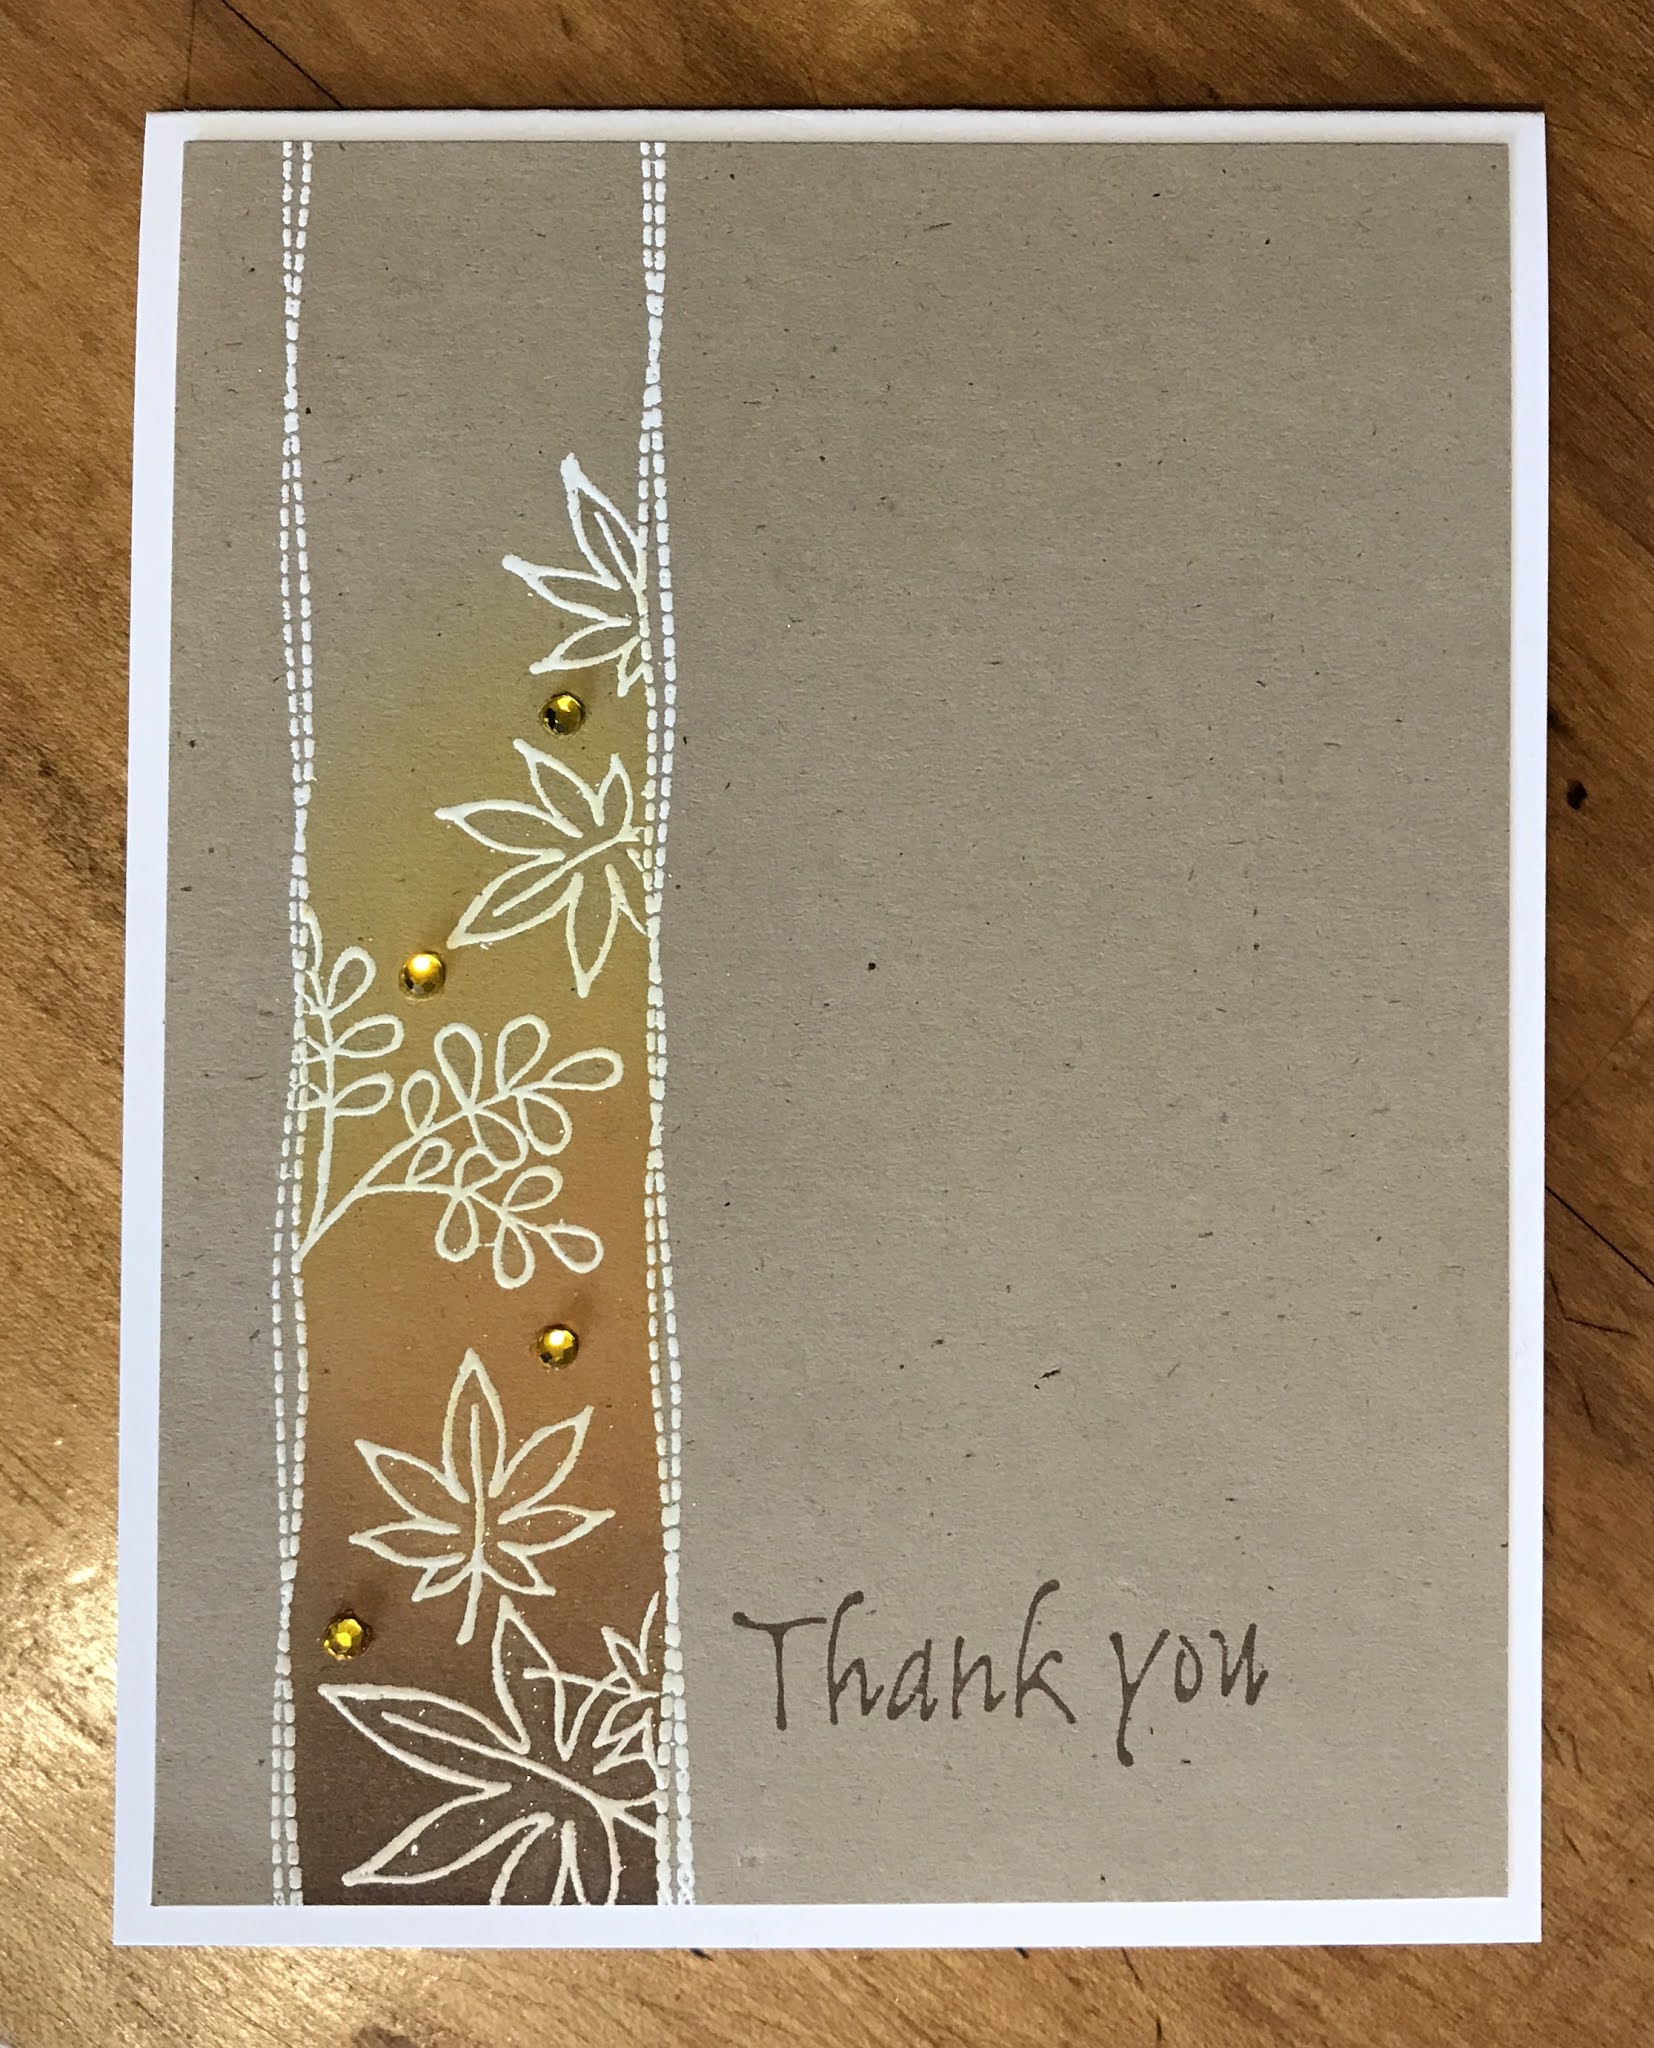
AUTUMNAL THANK YOU

Hello there!


(this kraft cardstock is lighter in person)

SUPPLIES

STAMPS - Stampin' Up! Artfully Asian set
INKS - Distress Oxide, Versamark 
PAPER - Neenah Solar White 110 lb, generic kraft
OTHER - white embossing powder, flat-back gems, liquid sparkle pen, blending brushes, heat gun for embossing


STEPS

1.  Trim kraft cardstock to fit white card front.
2.  Stamp border lines on kraft with Versamark and heat emboss with white powder.
3.  Mask border on both sides with Post It's, etc.  Stamp leaves in Versamark and heat emboss with white powder.
4.  Remask panel as above.  Using blending brushes, lay inks down in order shown.
5. Apply gems, and sparkle to leaves if desired.
6.  Stamp sentiment in darkest ink color.
7.  Affix kraft panel to white top fold card.
8.  Send card to your favorite person!


Thanks for stopping by - have a blessed rest of your day!  :o) 


November 11, 2019

Love in the Autumn Air


Following the guidelines for Challenge below but a little too late to enter card in:


STAMPS: background, tree and critter - Stampin' Up! "Woodgrain", "Love Bandits" set

INKS: Stampin' Up! Creamy Caramel, Close to Cocoa, Mellow Moss

MARKERS: Copic

OTHERS: paper piercer, white Sakura gel pen, hole punch, Ranger foam ink blender


1.  Stamp tree with green and brown inks.
2. Color tree leaves and tree trunk in with markers, and add grass and shadowing.
3. Use white gel pen to add highlights to leaves.
4. Use circle punch to punch out tree image and sponge caramel and brown inks around edges. 
5. Use paper piercer to punch small holes around circle edge and connect the dots with white gel pen for faux stitches.
6. Stamp woodgrain background on caramel cardstock and sponge corners lightly with brown ink.
7. Use paper piercer to pierce holes around border.
8. Use brown ink to stamp critter with phrase in lower corner of white cardstock panel and color flowers in with markers.
9. Affix panels as shown.


Thanks for stopping in!
May you be blessed and may you be a blessing...  :o)

September 26, 2008

Fall Scene - leaf pile!

Hi! Has fall hit 'your neck of the woods' yet? Our backyard is quickly becoming covered in pine needles - those are so much fun to try to rake up ;o)

Here's a card to get you in the mood if your leaves are still green! I used a little scene stamp called Shy Bear from I Brake for Stamps , and used a single word from the phrase "The path to a friends house is never long", drawing in the swirl with a finepoint marker. If you have never seen this Shy Bear line, go take a minute to look - the link above should get you right to the page... There is an image for every occasion - on a bike, peeking in a bassinet, checking out the birdhouse, etc. - I just love them, they are so sweet but not in a corny way. And there is enough substance to each image you really don't need anything more than maybe a few words and embellishments to make a great card!


(click on photo for more detail)
card measures 5 1/2" square
I started this card by stamping the image on cream cardstock using Staz-On Timber Brown. I then used the Technique Junkies Marker Water Coloring technique from the June/July 08 issue to color the scene, using a white gel pen on the bear's eyes. I used the M. Zindorf method of covering the image completely with a Versamark pen and embossing powder, allowing me to sponge in colors over the top to fill in the background. The moon was created by punching a circle from a Post-it note, and sponging over it. I swiped a sponge covered with Stampin' Up!'s More Mustard over it to tone the brightness down a little. I edged some of the tree with white gel pen for highlights, which helped to tie in the areas on the teeny branches where my Versamark pen went over the lines a bit, creating white areas ;o)
To put the card together I ran a piece of rust brown cardstock thru the Cuttlebug, using the Distressed Stripes folder, and mounted that over a scrap of Faux Handmade Paper I had left over (see the Technique Junkies June/July 08 issue for this one as well - you will love it!) Not sure who made these metal leaf brads but now I wish I had purchased another pack - the backs are really flexible and very thin so your layers don't bulk up. I 'needed' to fill in some of that light space at the bottom (which is Stampin' Up!'s Natural cardstock) so I markered in just the word from the stamp listed above, and then drew in the dots for movement.
Thanks for looking, and happy fall!

November 06, 2007

Acetate & Tissue Tall Autumn


I'm going backwards! Christmas yesterday, Autumn today - try to keep up LOL ;o)

Finished card measures 8 1/2" x 3 7/8" and fits in a business size envelope.

The main image panel is done using the acetate and tissue technique (see last week's posting for detailed instructions). The image is a large background leaf stamp by Northwoods Rubber Stamps. This panel is mounted to an orange cs for a thin border of color.

The brown panel under this was stamped using the same stamp and black ink, and then each side was edged with a sponge and black ink. The half circle punch used to make the tabs that the copper brads are on is by Stampin' Up!.

The orange panel under this has the phrase by Serendipity Stamps stamped in black, and then it's edged in Brilliance Cosmic Copper and then black ink. The base layer was stamped in Cosmic Copper using the same background stamp, and then edged with black.
When I had the card all put together I decided I needed to add the copper colored cording so here's my tip for the day:

*tip*
If you've finished gluing all your cs panels together and then decide to add floss, cording, etc. grab a large-bore needle and angle it under the top layer slightly so the hole doesn't show when looking straight at the card. Use a bead threader to thread the cord. These can be had cheaply at a Joann's/Michael's, and look like a very thin wire twisted around itself with a loop at the end. I couldn't work without mine!


It still looked too stark, so I grabbed some loose leaf embellishments I picked up at Joann's on a lark a few days back because they looked handy and were so cheap. I kid you not, you get about 200 of these AT LEAST I didn't count for $1.99! My two packs had maple and oak leaves. Once I had placed them on the card with Mini Glue Dots (would have a hard time making cards without these too) they looked too dull, so I touched the high points with Cosmic Copper right from the foam pad, and I think it was just the right amount of glimmer.
Here's a photo of how I store my loose leaves and flowers - it works so well for me! The metal rings have a hinge and open and shut easily. They are 2" rings, and I think I picked them up at Office Max not too long ago. Just hole punch one corner of a ziploc baggie and add when needed.
Thanks for looking!


October 30, 2007

Paisley Pumpkin

Before I do anything else I want to say THANK YOU SO MUCH for all your sweet comments! I'm so touched (:o) And to anyone who has been wanting to start a blog of their own, don't wait another day - it's so much easier than I imagined it would be.

Okay, I have to share the inspiration for the card today. My Mom was kind enough to snag a bunch of See-D's stamp sets for me when they were clearanced, and we both ended up with some Paisley sets. A couple weeks ago she sent this cool sample stamping. She will be horrified that I published this unfinished work - sorry Mom! LOL but I loved the idea and the placement of the paisleys, and the overall shape of the pumpkin/gourd is perfect.


So I dug out my paisley set (See-D's Perfect Paisley #50326) and three orange inks by Stampin' Up! (Really Rust, More Mustard and Pumpkin Pie). I stamped various paisleys into a rough outline I had drawn in pencil. I ended up with lots of gaps at the edges, so I trimmed a Post It note into a crescent shape and sponged the darker ink where the section lines would be, and the outside edges. For the stem I ripped a v in a Post It note and stamped a distressed paisley in Old Olive at the top. The swirls were stamped in Chocolate Chip and Old Olive. Which brings me to my

*tip*

if you get ink where you don't want it, grab an eraser immediately and buff it to get as much off the surface of the paper as you can, then grab an Exacto blade and gently scrape the top layer of the paper off, going both directions. This will rough up the paper a bit, but you can usually make it less noticable by stamping over it, etc.

The brown background cs was stamped with a leaf pattern in black ink, then sponged around the edges in black. The main panel was sponged around the edges in Brilliance Galaxy Gold, then Chocolate Chip. The embellishment is an antiqued brass-tone circle with a rope border (a bottle cap would work just as well) and since I didn't have a circle punch to fit inside I chose the closest size and stamped the phrase (Savvy Stamps) on cream cs, punched, sponged the edges and pop-dotted it in the recessed center. The ribbon, which seems to go with every fall card I work on LOL is from Joann's.

The finished card measures 5 1/2" x 4 13/16"
Thanks for looking!