Welcome to my new series One Item, Multiple Looks!
I'm really excited to inspire myself and others to
* explore and stretch the supplies we own
* let go of anything we don't love
* choose wisely when repurchasing
* explore the endless techniques and styles available to us
I will be posting one new grouping featuring a different specific crafty item each week for at least the month of January or so. To access all posts in this series just click on the topic One Item Multiple Looks! in the sidebar Index of Posts... Hope you enjoy!
This week's item is a gorgeous flower stamp by Stampinback:


Blue on Kraft Card

SUPPLIES
STAMPS flowers - Stampinback, words - Hero Arts Prayers Stamp & Cut #DC183
INKS Memento Tuxedo Black, Versafine Onyx Black, Versamark
DIE word - Hero Arts Prayers Stamp & Cut #DC183
EMBELLISHMENTS random white enamel dots
OTHER colored pencils, white gel pen, white detail embossing powder
CARDSTOCK dark gray, kraft and white

Let's get started!
STEPS
1. Cut cardstock panels to fit a standard white card in layers as shown. Set aside.
2. Stamp flower in black Memento ink on kraft panel. Stamp again on masking paper and fussy cut.
3. Apply mask to stamped flower and overstamp side flowers. Remover mask.
4. Use colored pencils to fill in flowers. Highlight with white gel pen.
5. Use stamp positioner to stamp black outline again over main flower in Versafine ink.
6. Run word die through cutting machine two times on white scrap cardstock. Use glue to adhere letters into a stack.
7. Stamp words on gray cardstock with Versamark ink and heat emboss with white detail powder. Trim into rectangles.
8. Time to assemble! Layer panels as shown. Adhere word die cut stack and word strips.
9. Time to embellish! Add enamel dots to panel.

Playing along with the following Challenges:

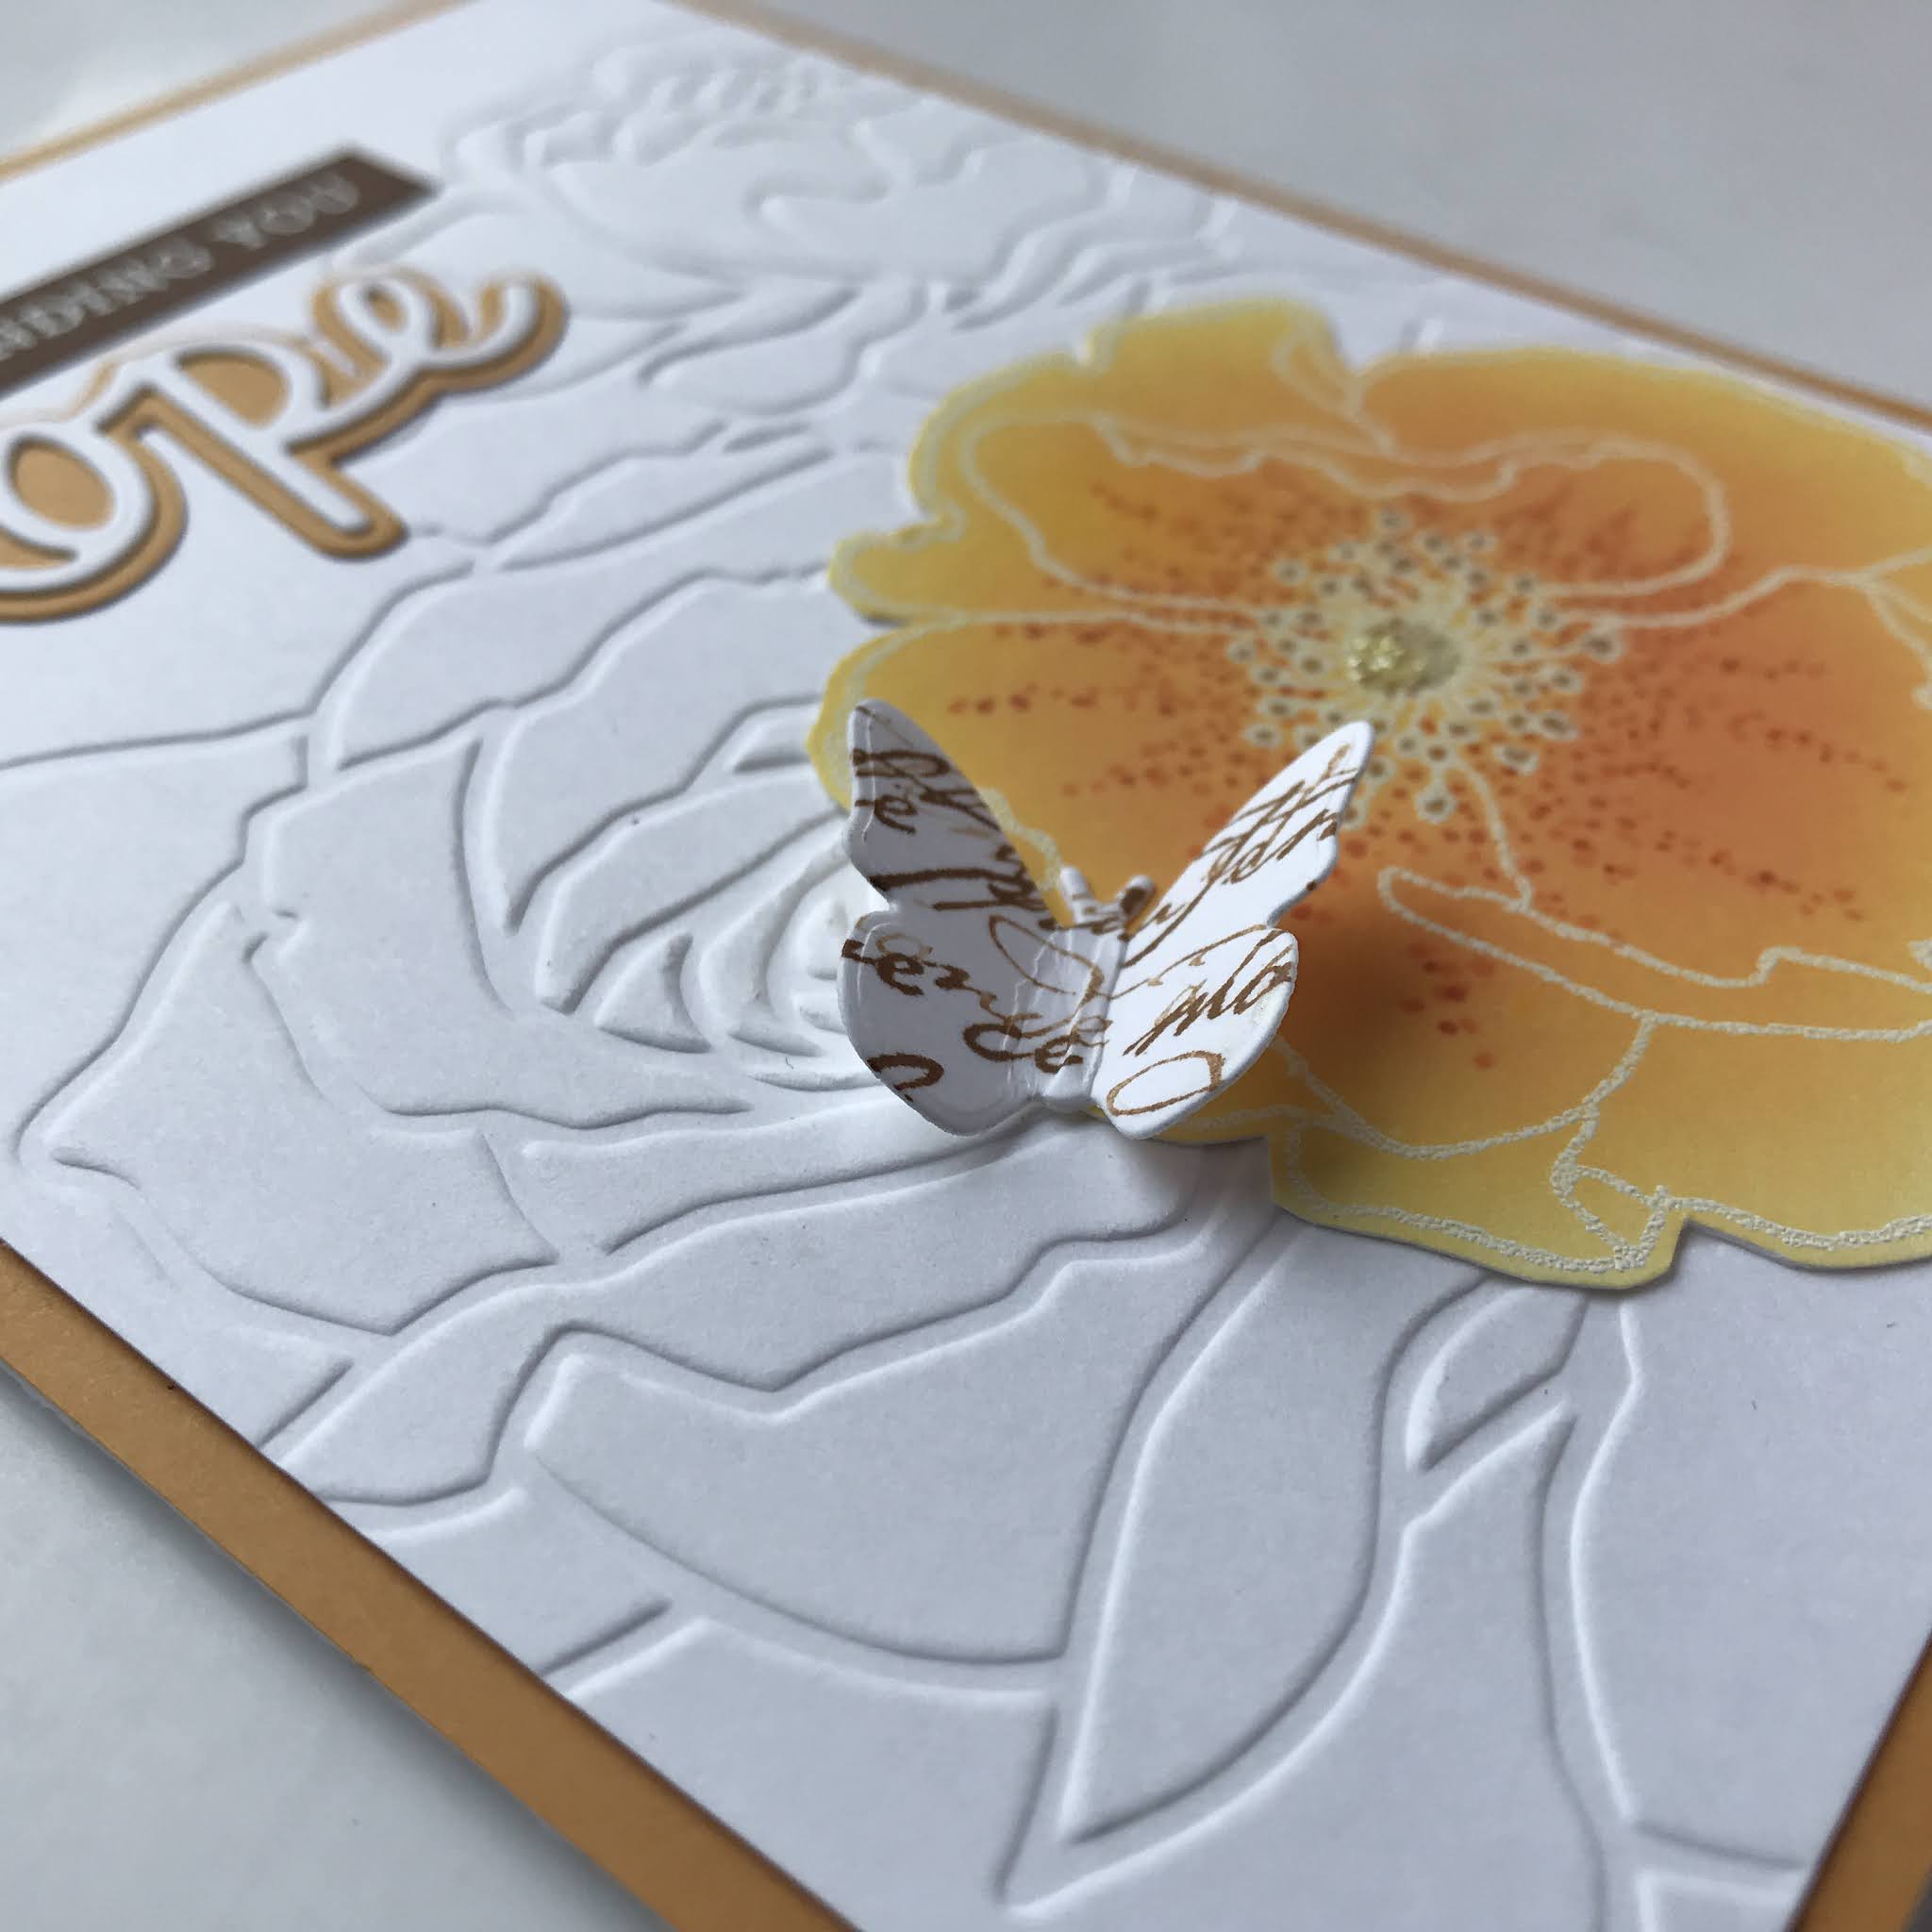
Yellow Hope Card

SUPPLIES
STAMPS flower - Stampinback, greeting words - Hero Arts Prayers Stamp & Cut #DC183, background words (on butterfly) - Stampin' Up! French Script
INKS Memento Tuxedo Black, Versafine Onyx Black, Versamark, assorted Distress
MARKERS Copic
DIE Hope - Tonic Studios Will's Hand, butterfly - random
EMBOSSING FOLDER Stampin' Up!
OTHER white embossing powder, glitter gel pen
CARDSTOCK dark brown, mustard and white
Let's get started!
STEPS
1. Cut cardstock panels to fit a standard white card in layers as shown. Set aside.
2. Run white panel through embossing machine with flower folder.
3. Stamp flower in Versamark ink and heat emboss with white detail embossing powder.
4. Blend yellow and orange inks into flower as shown. Highlight with markers and sparkle gel pen. Fussy cut flower.
5. Stamp French Script in brown ink on white cardstock scrap. Run through die cut machine.
6. Run hope through die cut machine with white and mustard scraps as shown.
7. Stamp greeting with Versamark ink on brown cardstock scrap and heat emboss with white detail embossing powder.
8. Time to assemble! Adhere panels to standard white card base as shown. Apply flower to bottom right corner. Mount butterfly by putting tape or glue only on the body. Bend wings upward when dry. Layer Hope die cuts and adhere as shown with word strip.

Playing along with the following Challenges:

Red Poppies Card

SUPPLIES
STAMPS flowers - Stampinback, background words - Stampin' Up! French Script
INKS Versafine Onyx Black, Distress Vintage Photo
DIE Tonic Studios #1884e Will's Hand
OTHER Nuvo Crystal Drops in Simply White, watercolors - Prima Art Philosophy Confections The Classics, white acrylic paint
PAPERS vellum
CARDSTOCK white, dark brown and antique cream

Let's get started!
STEPS
1. Cut cardstock panels to fit a standard white card in layers as shown. Set aside.
2. Stamp flower head in black ink on lower portion of cream panel, and on masking paper.
3. Apply mask to large flower head and overstamp tall flower stems. Stamp side flower stem on masking paper also.
4. Leave mask on large flower, and apply mask to side flower as well. Overstamp script in brown ink.
5. Use watercolor and a small amount of water to color in flowers and stems.
6. Splash white acrylic paint over panel.
7. Run word through die cut machine with white and brown cardstocks. Glue layers together.
8. Time to assemble! Wrap image panel with vellum and adhere on the back side. Adhere image panel to standard white card front. Glue die cut word stack onto vellum.
9. Time to embellish! Apply crystal white drops to vellum.

Playing along with the following Challenges:

White Love Card

SUPPLIES
STAMPS flower - Stampinback
INKS Versamark, Distress Dye
DIECUT leaves - Sizzix Sizzlets #656064, label - Stampin' Up! Bigz Top Note #113463, word - Tonic Studios #1891e Will's Hand
EMBOSSING FOLDER Stampin' Up! by Sizzix
OTHER Nuvo Crystal Drops in Simply White, Stickles Glitter Glue in Frosted Lace, white detail embossing powder
CARDSTOCK white

Let's get started!
STEPS
1. Cut cardstock panel to fit a standard white card in layers as shown.
2. Run white panel through embossing machine for base layer background.
3. Run white cardstock scraps through die cut machine once for label and leaves, and two times for the word.
4. Glue words together. Apply glitter glue to word stack.
5. Stamp flower head in Versamark and heat emboss with white detail powder.
6. Blend ink onto flower. Fussy cut.
7. Apply glitter glue to center of flower, and white chrystal drops to the stamens.
8. Time to assemble! Adhere panels as shown. Trim some leaves as desired and adhere them underneath the flower. Glue die stack down as shown.

Playing along with the following Challenges:

Thank you so much for visiting! I hope you enjoyed, Nancy J