Welcome to my new series One Item, Multiple Looks!
I'm really excited to inspire myself and others to
* explore and stretch the supplies we own
* let go of anything we don't love
* choose wisely when repurchasing
* explore the endless techniques and styles available to us
I will be posting one new grouping featuring a different specific crafty item each week for at least the month of January or so. To access all posts in this series just click on the topic One Item Multiple Looks! in the sidebar Index of Posts... Hope you enjoy!
This week's item is a rubber stamp of a wonderful fashion figure from Stampinback:


Gray Cityscape Card

SUPPLIES
STAMPS building, words and figures - Stampinback
INKS Versafine Onyx Black, Stampin' Up! Going Gray
DIECUT Stampin' Up Framelits - Apothecary Accents #127003
EMBELLISHMENTS random colored aluminum dots
OTHER Crayola 12 pack crayons, Stickles glitter glue in Frosted Lace
CARDSTOCKS dark and light gray, white

Let's get started!
STEPS
1. Cut cardstock panels to fit a standard white card in layers as shown. Set aside.
2. Die cut white cardstock (ALTERNATIVE to specialty die cut: search your house for interesting borders and forms you can trace, and then fussy cut for a unique panel).
3. Stamp buildings in gray ink on light gray panel (ALTERNATIVE to row of buildings: stamp the same building (or) tree, etc repeatedly).
4. Stamp two background figures on white panel, and again on masking paper (ALTERNATIVE to masking paper: Post-it notes (or) copy paper with removable tape).
5. Apply masking paper to figures and use stamp positioner to overstamp buildings in gray ink so they will line up with image already stamped on gray card (ALTERNATIVE to stamp positioner: the L shape (long and short side) from a smaller picture frame that lays flat, and a piece of thicker acetate (or) plastic from store bought packaging).
6. Stamp main figure image on white cardstock scrap in black ink. Allow to dry and then color in with crayons. Apply glitter glue as desired. Fussy cut. (ALTERNATIVES: any coloring or glittering mediums you have on hand).
7. Stamp words in black ink on white cardstock scrap. Cut into rectangle. Adhere to dark gray rectangular scrap.
8. Time to assemble! Adhere dark gray panel to white cardfront, and layer light gray background panel on to dark gray. Adhere white die cut panel to light gray background, lining up designs. Use foam tape to adhere figure to white die cut. Adhere word panel as shown.
9. Time to embellish! Add metal dots wherever desired to highlight image (ALTERNATIVE to metal dots: any form of dot-like embellishments (or) punch colored cardstock dots and apply gloss medium).
Playing along with the following Challenges:

Grunge Frame Card

SUPPLIES
STAMPS figure - Stampinback, words - Innovative Stamp Creations (Women Around the World II sheet), elements - Stampin' Up! Extreme Elements and Looks Like Spring sets
INKS Versafine Onyx Black
EMBOSSING FOLDER Sizzix Tim Holtz Alterations
OTHER white matte acrylic paint
CARDSTOCKS random black, medium gray, white, pink

STEPS
1. Cut cardstock panels to fit a standard white card in layers as shown. Set aside.
2. Emboss medium gray panel with folder and apply white matte acrylic paint lightly to raised area, and center as shown with foam brush. Allow to dry. (ALTERNATIVE to acrylic paint: run a white pigment pad over same areas).
3. Stamp figure in black ink on center of embossed painted panel.
4. Stamp words in black ink on pink cardstock and trim strip to fit across gray panel (ALTERNATIVE to the perfect words stamp: hand write (or) type (or) cut from magazine, etc).
5. Stamp random elements with black ink around frame as shown (ALTERNATIVE to grunge elements: use black marker to hand draw doodles and shapes/patterns).
6. Time to assemble! Adhere black panel to white cardfront, and layer gray panel on to black. Adhere pink word strip to front of card.

Playing along with the following Challenges:

Rainbow Card

SUPPLIES
STAMPS figure - Stampinback, word circle - Autumn Leaves #AL2618 Sentiments Circles
INKS Versafine Onyx Black, Distress Oxides, white pigment
STENCIL Taylored Expressions #TESN07 Bubbly
EMBELLISHMENTS random faceted mirror back flat back gems
OTHER waterbrush
CARDSTOCKS random pink, black and white
STEPS
1. Cut cardstock panels to fit a standard white card in layers as shown. Set aside.
2. On large white cardstock panel, use a blending tool and Distress Oxide inks to blend one color into each corner and in center of each side (ALTERNATIVE to Distress Oxide inks: use any pigment or dye inks (or) watercolor a panel (or) scribble markers on your acrylic block and pick up pigment with a paintbrush).
3. Lay stencil over rainbow colored panel and apply white pigment ink lightly (ALTERNATIVE to stencil: use bubble wrap (or) old school pencil eraser to apply ink).
4. Stamp figure in black ink onto white cardstock scrap. Use waterbrush to loosely color with Distress inks. Trim panel to rectangle. (see ALTERNATIVES on #2)
5. Stamp circular words in black ink and trim closely (ALTERNATIVE: stamp any sentiment and punch or die cut into circle shape, adding lines, etc with a black marker or pen).
6. Time to assemble! Adhere pink panel to white cardfront, and layer rainbow background panel. Adhere white main image rectangle panel to black rectangle and apply to background as shown. Use foam tape to adhere word circle.
9. Time to embellish! Add gems to word circle.

Playing along with the following Challenges:

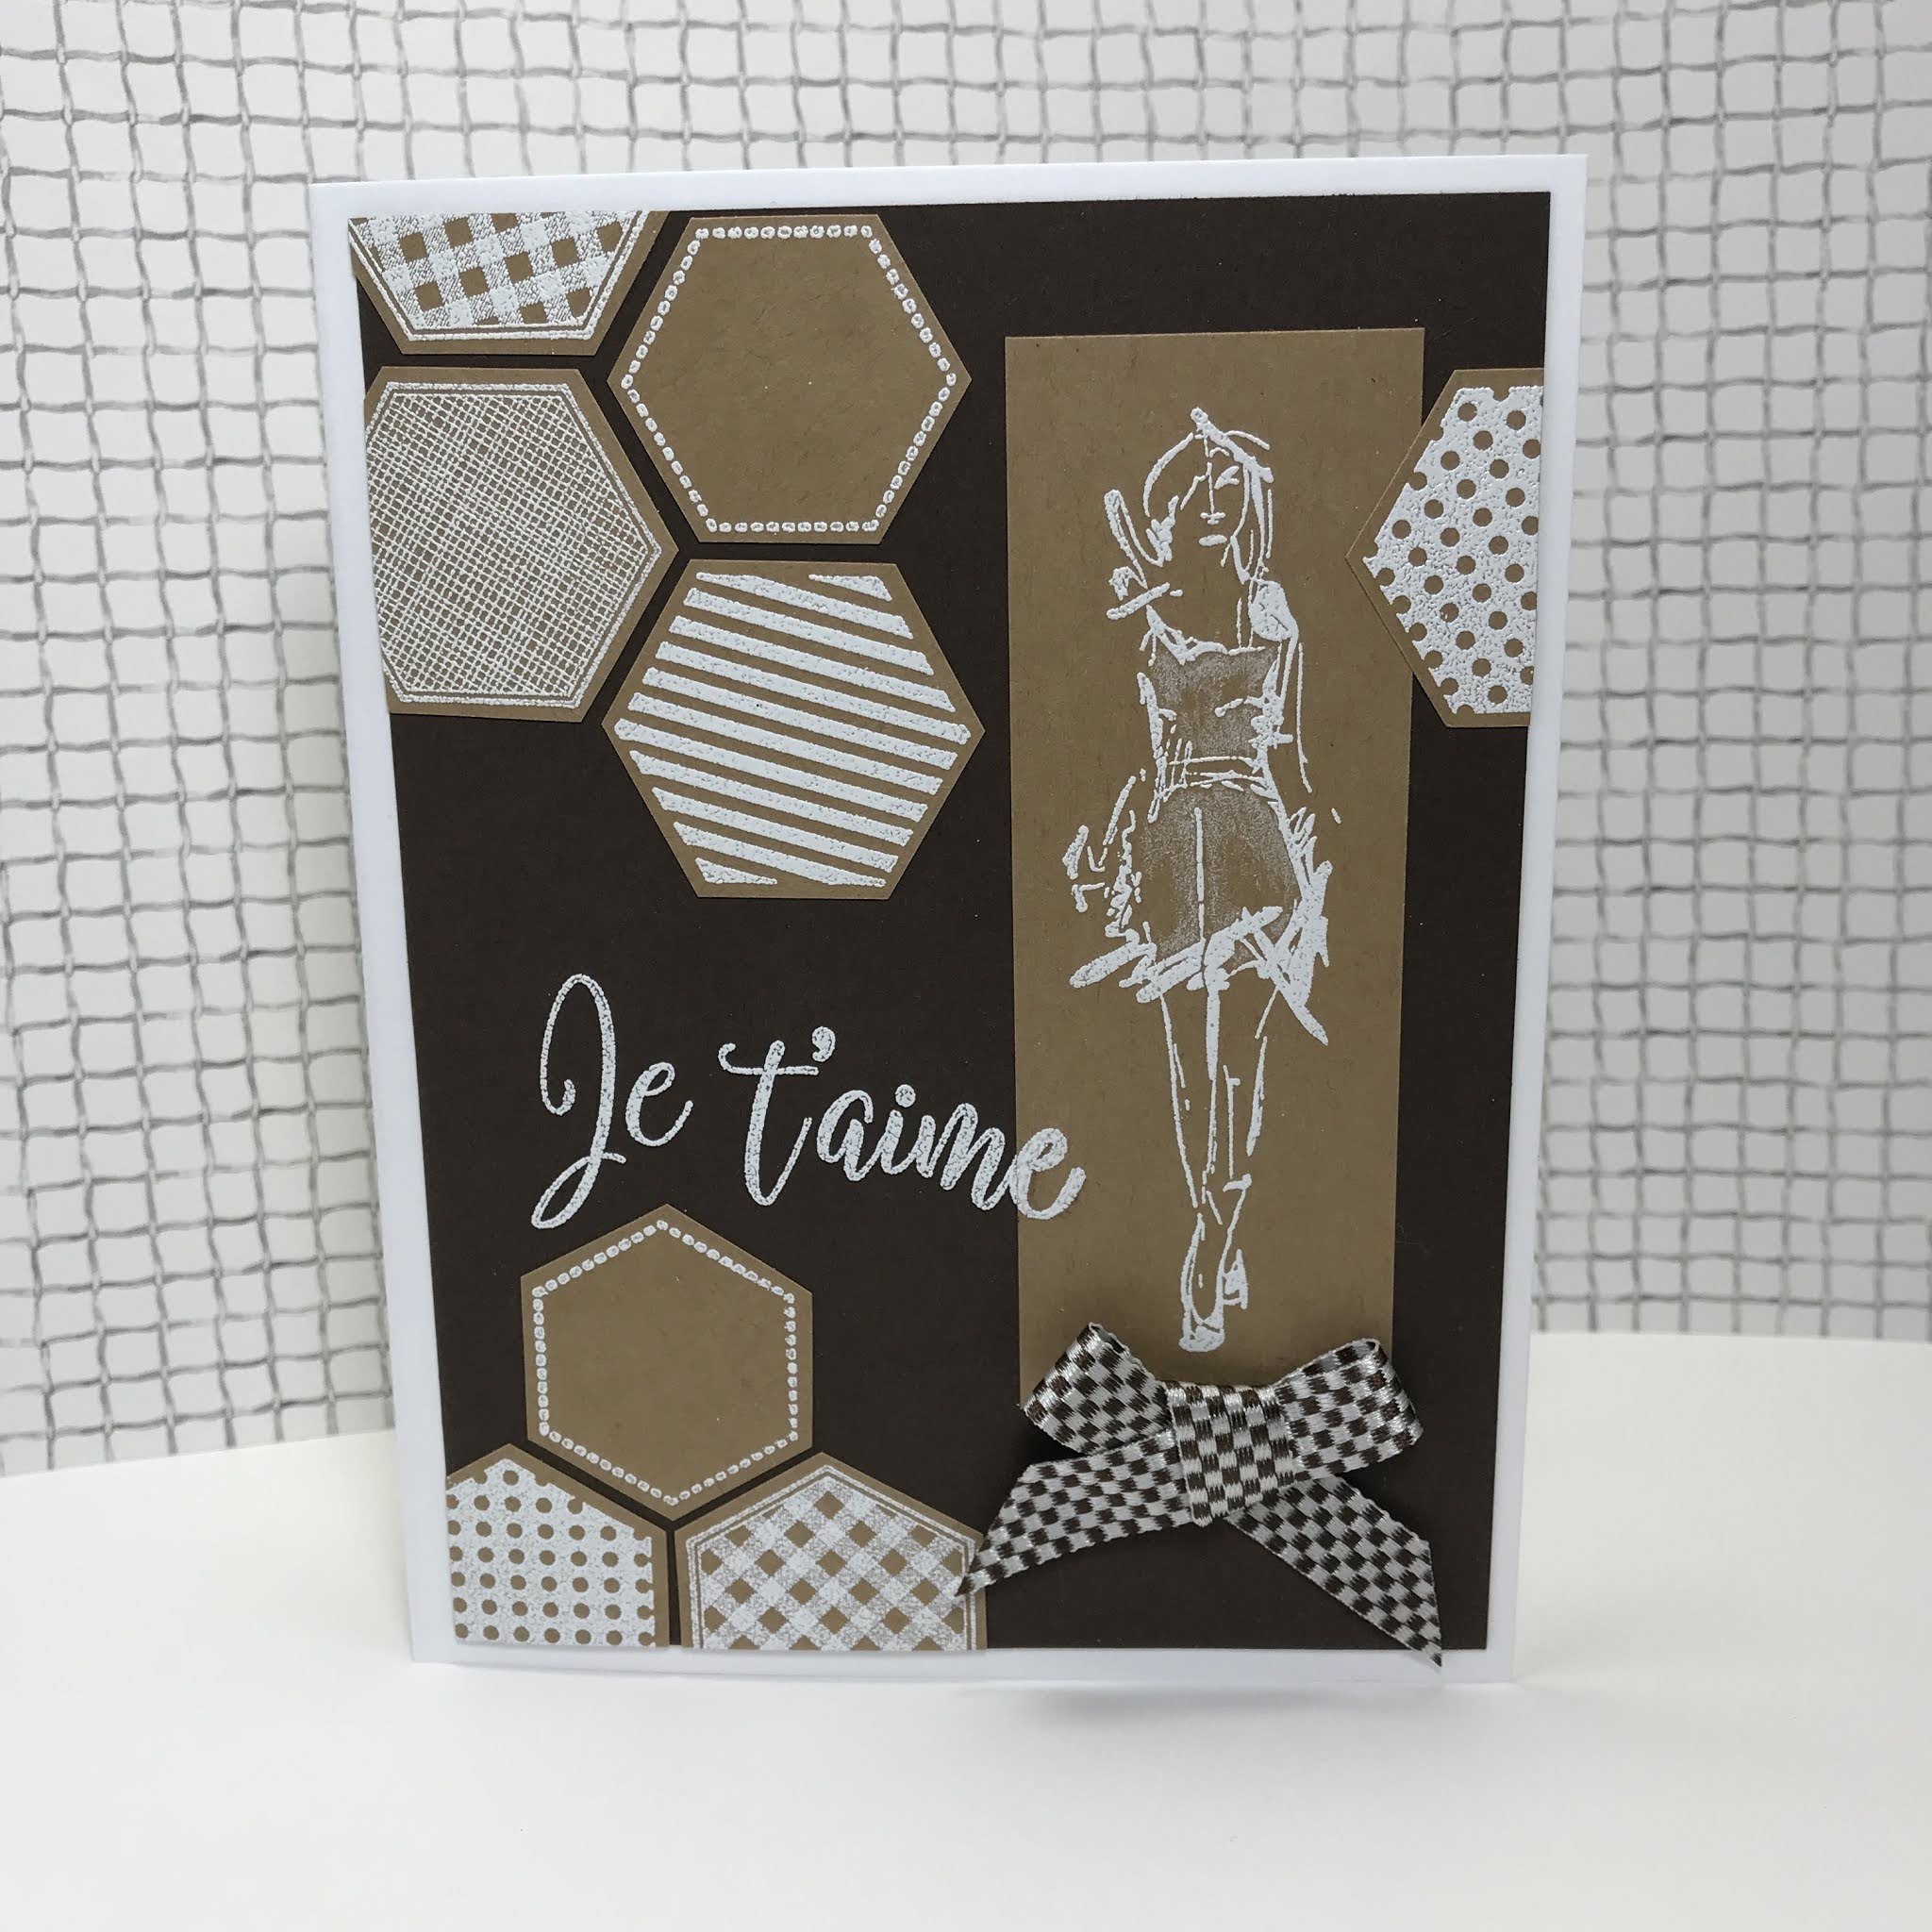
Monochrome Brown Card
SUPPLIES
STAMPS figure - Stampinback, elements - Stampin' Up! title unknown - Crafter's Companion French Greetings
INKS Colorbox Frost White pigment
DIECUT Stampin' Up Framelits - Apothecary Accents #127003
EMBELLISHMENTS random colored aluminum dots
OTHER white color pencil, random ribbon, white detail embossing powder, white gel pen
CARDSTOCKS tan, dark brown, white

STEPS
1. Cut dark brown cardstock panel to fit a standard white card in layers as shown. Set aside.
2. Stamp figure in white pigment ink on tan panel. Heat emboss with white detail powder.
3. Use white color pencil to highlight figure. Cut figure panel into rectangle.
4. Stamp and heat emboss in white multiple elements on tan cardstock. Fussy cut leaving a border. (ALTERNATIVE to design element stamps: use a white gel pen to draw designs).
5. Time to assemble! Adhere dark brown panel to white cardfront. Layer tan elements and main panel with figure on to brown panel as shown.
9. Time to embellish! Stamp word in white and heat emboss. Fill in any gaps with white gel pen. Adhere ribbon as shown.

Playing along with the following Challenges:

Thanks for stopping by, and I hope you are so inspired to use what you have to make something you love! Nancy J
21 comments:
Awesome cards. So creative. Thanks for sharing over at Aud Sentiments, Colour Crazy.
Such creative uses of this one stamp! And a great way to challenge yourself and inspire others. All four cards are terrific. Thanks for joining the fun at the Sisterhood of Snarky Stampers!
Great showcasing of the lovely girly image, many thanks for sharing and joining in with our 'Feminine' theme at We Love Chocolate Baroque challenge this month.
B x
Wow, love the image you've chosen! Thanks for playing with The Sisterhood, Jo x
What a great series! These all look so different and so wonderful. Thanks so much for playing along with us at the Sisterhood of Snarky Stampers challenge blog!
WOW! Just WOW! I love how you created so many cards from the same image. Love Love Love them all! Thanks for sharing and joining the Taylormadecards4u challenge!
Great collection of creations!
Thanks for getting your glitter on with Edna and the Sisterhood of Snarky Stampers!!
I love all the different looks you created from this stamp - it looks great as a silhouette but also coloured in. Thanks so much for playing along with us at TIME OUT! Jill
Cool series of projects using the same stamp! Great inspiration! Thanks for sharing at Sisterhood of Snarky Stampers!
Terrific work on each one, Nancy, but I really love the last one the best. All the neutral browns and tans make the whit figure just pop! Great geometrics. We're so excited to see you playing along with us in our Anything Goes challenge at Creative Knockouts this week. Good luck.
NanaConnie DT
Brilliant, I have stamps going back 30 years or so and still enjoy using them as much as ever. If you run out of ideas for ways of using a stamp just look around because the inspiration never really ends. So who needs new stamps? Well all of us of course! I love the idea of this series and am off now to see more. x
WOW, you have done one amazing job in creating, each one so unique and beautiful. Absolutely love all of them! So glad you joined us for our ATG Challenge at Creative Knockouts!
Echoing the others: your showcases of this stamp in a variety of fashions are absolutely lovely and so creative! You've really stepped up to the goals you set for yourself and have certainly inspired me to do the same! Time to give some love to the many stamps I *already* have and cut back on shopping! Thank you so much for joining us at Just Us Girls.
~carol
I love the idea and the result!
Thank you for joining our challenge at We love Chocolate Baroque
Awesome work, they are all so fab I just can't pick a favourite!!
So glad you have shared this with us at 613 Avenue Create.
Please come back again!
The best of luck with your entry.
Stay safe and well.
Jackie, DT member at 613 xx
Love your cards! I'm not sure which one I like the best, as they are all so awesome! Thank you so much for entering our Challenge at TaylorMadeCards4U this week. Good luck!
Blessings, Jeanie Ellis DT
TaylorMadeCards4U
taylormadecards4u.com
Scrapbookingmamaw MyBlog
Such amazing cards!
I like them all!
Thanks for linking up at Polkadoodles Craft Challenge.
Ana
these are stunning , thank you for playing along with My Time To Craft DT Judith CE
I really love your cards and love your idea of making multiple cards. Thank you for joining the Crafter's Castle Challenge Blog. ~ Tracy DT Member
This is a great series! I am sure that you are helping lots of crafters learn to look at their stamps in new and exciting ways! Thanks so much for sharing with us at 613 Avenue Create!
Hugz,
Chana Malkah, Owner
Super creative cards and love how you have achieved so many different looks using the same stamp. Thank you for joining in on the fun at Uniko. Crafty Hugs Bev x
Post a Comment